What makes a good portrait is a completely subjective question. If you were to ask 100 photographers this question you’d likely get as many answers. Some ideas would overlap, others would clash.
That said, few would disagree with the idea that there is a foundation of near universal belief about the core elements of what makes great portrait. These elements work in concert to draw attention to the person in the photo. The 5 key elements of all good portraits are:
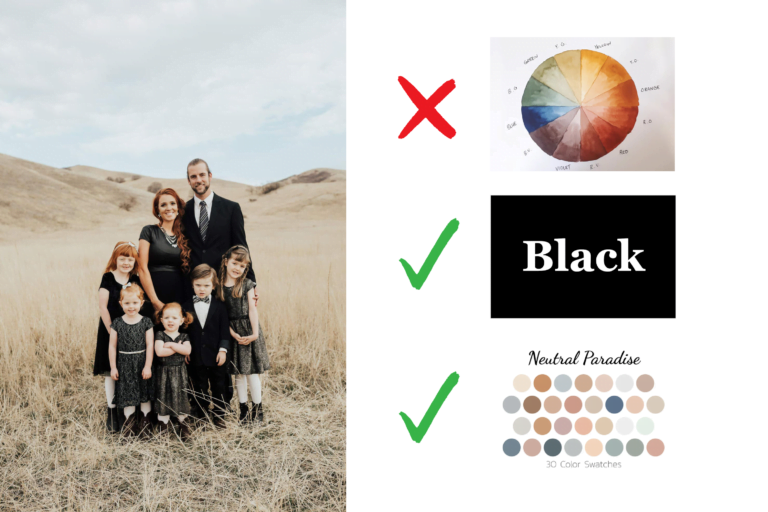
What keeps all “good” portraits form looking the same is style. In my portraits, I like a dynamic setting, classic lighting, traditional posing, genuine expression and everything nailed down in camera.
By articulating what I like from each element I am naturally able to create a recognizable look you’ll notice across my portfolio. This process keeps me focused on a district style and fosters consistency when people hire me for portraits.
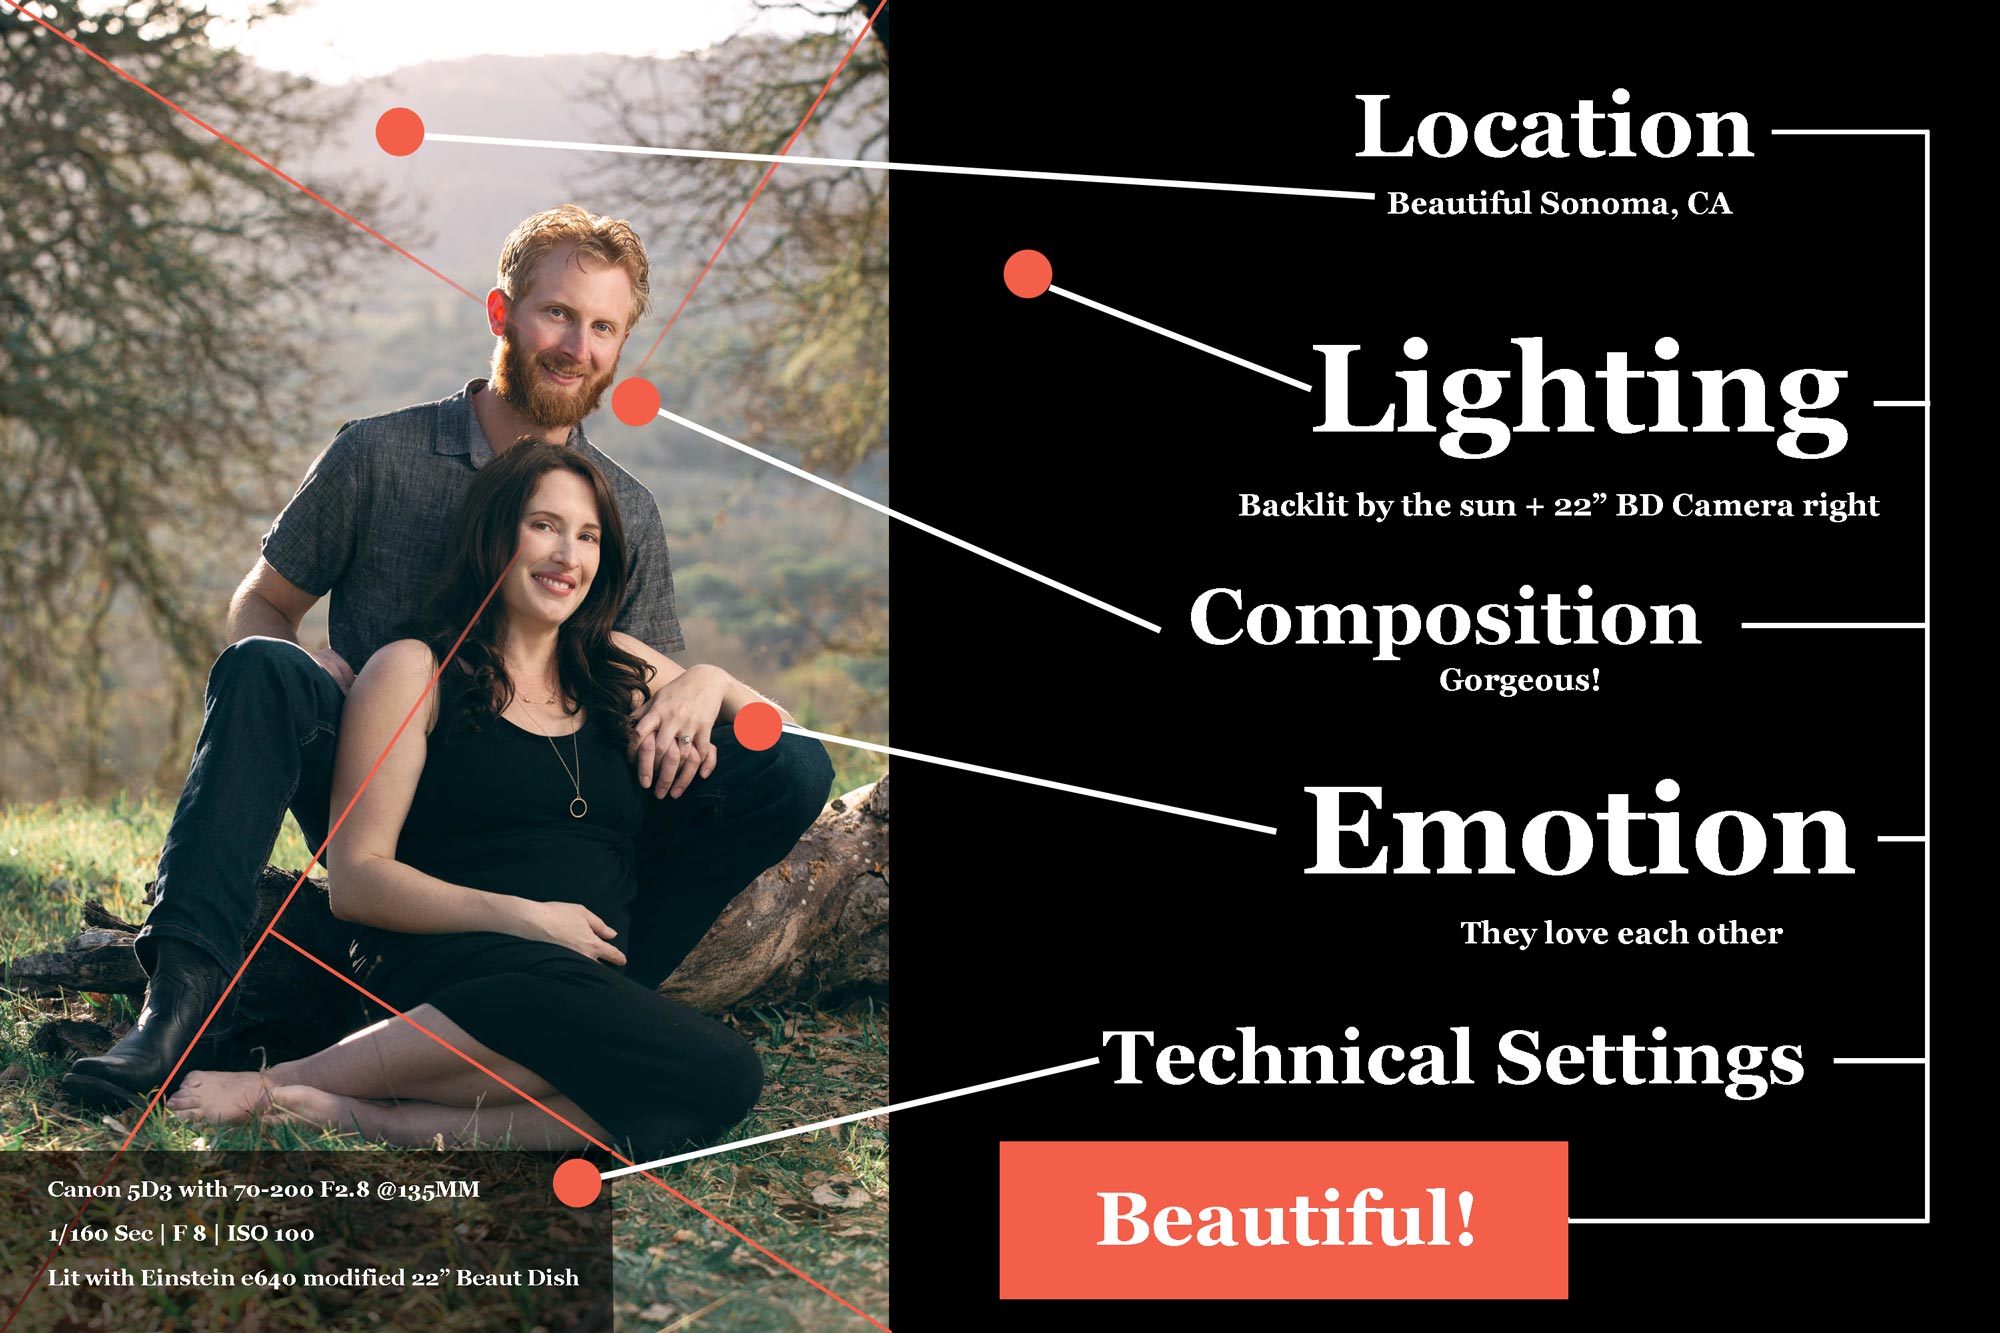
What Makes A Good Portrait - Location

I always begin creating a portrait by figuring out where I want my subject to be. This allows me the space to thoughtfully frame the person’s photo and begin building the other core elements of the portrait.
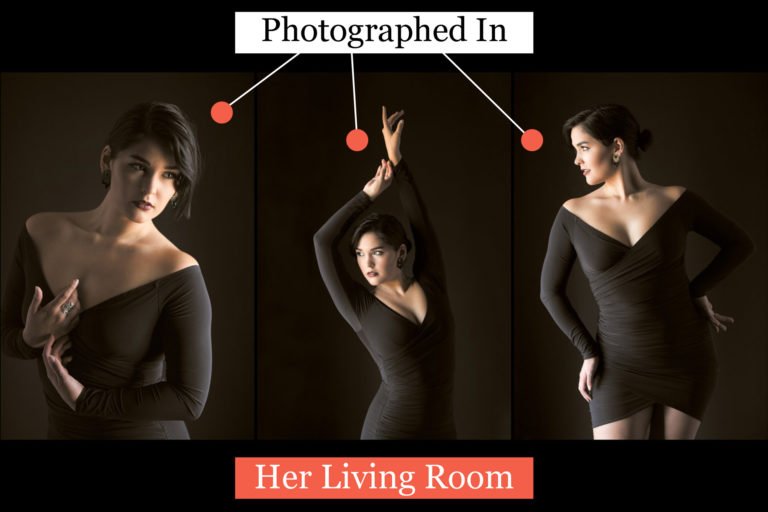
The choice of where a portrait will be captured can influence many aspects of your photos. Location can suggest how your portrait should be lit, how it should be framed and even the subjects pose.
For instance, on a photo shoot I’ll often notice interesting ambient light within the space. When this happens, I like to pose my subject into this light for a flattering portrait. This saves me the effort of having to create the lighting from scratch or at least gives me a good starting point. The area where the interesting light is, becomes my location by default.
Other times a beautiful landscape might be integral to the final photo. In this case I’ll usually frame the background and my subject for the composition I want. After that I’ll adjust my camera settings, build my lighting and direct the subject into a flattering pose.
Why is Location Important in Photography?
Location is important because it is the setting of your portrait. It’s the foreground, the background and everything in between. A good location supports the subject and draws attention to them while also contributing to the overall feel. This is why the location is an integral element of any great portrait.
What Makes A Good Portrait – Lighting
Good lighting is an obvious cornerstone of any exceptional portrait. The way light falls across a person’s face and body is arguably one of the most important aspects of a portrait. Photography literally translates to painting with light, so without light, we couldn’t have portraits.
Lighting is a potent tool that can be used to create drama, accentuate features and even hide problem areas. The way a portrait is lit can make people look their best, or show them at their worst. The light patterns that fall across a person’s body and face are dictated by the direction and quality of light.
Flattering light always comes from the side or slightly above a person. Unflattering light would be something like a flash light illuminating a person face from below their chin. This is called horror light. Directions of light considered flattering, are described in terms of light patterns.
What Are Light Patterns?
Light patterns refer to the pattern of shadows that happen when light is directed on a person’s face. These patterns are determined by the direction of the key light in relation to the subject’s face. The 5 most common light patterns used for portraits are:
- Paramount Light / Butterfly Light
- Split Light
- Rembrandt Lighting
- Loop lighting
- Flat Lighting / Beauty Lighting / Ring Lighting
Lighting is then further defined by perspective, hardness and dynamic range. Perspective, for instance, helps describe whether a portrait is short or broad lit. Hardness describes the crispness of the shadows. Dynamic range refers to how dark the shadows are in relation to the highlights.
What will make good lighting for one person’s portrait, might not look good for someone else’s. Full unfiltered sun for example is a hard light source with a huge dynamic range. These qualities inherent in sun light chisel features unlike any other light source. It’s one of my favorite choices for people with great bone structure and flawless skin.
Full sun is not a light source I would choose for an older person wanting to look younger. This is because the hardness, range, and mono direction of the sun would highlight every imperfection in the persons skin. For someone sensitive about their wrinkles, softer light sources and generous fill would make for a more flattering portrait.
Portrait Composition In Photography
Portrait composition in photography describes the crop, framing, and how the person is posed. These elements all work together determine what the viewer will see in the final image and how it will flow.
It’s an extremely deep topic worthy of it’s own article. For now, here are the basics of composition all great portraits have.
What Makes a Good Portrait - Crop
The crop refers to the aspect ratio of a photo. It is also a word used to describe what the photographer chooses to exclude when composing his frame. One of my favorite mantras in photography is:
If you don’t like something hide it, if you can’t hide it crop it, if you can’t crop it, don’t shoot it.
The point is that what you choose to exclude from your frame is as important as what you choose to include. This is one of the main secrets for how to create a flattering portrait in a sub-par location. Considering what to exclude from the frame can literally be the difference between a beautiful portrait and something shot by an amateur.
Tight crops on a person need to be done with care so you don’t cut off body parts in ways that are visually displeasing. Generally, it’s good practice to include the full arm or leg of a person or crop it above the knee or elbow. Cropping below the elbow or knee tends to make limbs look amputated.
Crop isn’t just about what you choose to cut out of your photos though. It also refers to the aspect ratio of the final photo itself. I use a full frame mirrorless camera for the portraits I capture. Full frame cameras have a native crop of 2×3. Some medium format film cameras for comparison captured images in square crop.
The reason the aspect ratio of a crop matters is because the intersection points of guides can change location based on aspect ratio. This dovetails into another important aspect of composition which is framing.
What Makes a Good Portrait - Framing

Framing is how you decide to situate your subject in your crop. For example a common guide most people are aware of is the rule of thirds.
The rule of thirds are the tic tack toe lines you’ll see when you crop an image on your phone. Points of interest should generally be on the intersections of these points for a pleasing composition. Despite aspect ratio, so long as you keep these focal points on the intersections, the photo should be framed reasonably well.


The rule of thirds is one of many guides established by tradition. Others include leading lines, triangles, the golden ratio and my personal favorite the golden spiral.
You can see these guides being followed on paintings hundreds of years old in your favorite museum. The old master painters were famous for showcasing points of interest along these guides. They often achieved this in portraiture via posing.
What Makes a Good Portrait - Posing
Posing comes down to the idea of accentuating strengths and down playing problem areas using angles and perspective. How to pose for pictures is unique to each person and is based on gender and body type. In other words, men should be posed differently than women, and thin people should be posed differently those with curves.
The key idea when posing is that body parts closest to the camera get accentuated while areas further away get de-emphasized. Decisions of how to position a particular body largely come down to taste.
For instance, in my portraits, I like to pose curves onto skinny women to help give them more shape. By contrast, when I pose curvier women I might push their hip away from the camera to help make their butt look smaller utilizing perspective.
In my process, posing is also the lynch pin I use to finesse some of the aspects already mentioned. An example of this would be when directing a person into strong directional light. By posing a person into the light source, you can perfect the light pattern.
Posing is one of the hardest aspects of portraiture for photographers. It’s a deep topic also worthy of its own post. That said many people ignorant on the topic believe posed portraits are inferior to candid photos because they lack authenticity. This is because many posed portraits are done poorly and lack of genuine emotion.
What Is The Importance Of Emotion In A Portrait?

Although we don’t know exactly how much, the consensus is that that body language makes up the vast majority of human communication. Since we can’t speak in photos, body language thus becomes the only way a person can communicate in portraits.
Body language includes facial expressions and body cues that form clusters. Reading these clusters, body language experts can reliably interpret attitudes and emotions through behavior. This means that there is no one thing you can do to convey something via body language. It is the sum of all behaviors that indicate what a person is thinking and feeling.
I direct body language into my portraits to add emotional depth and authenticity. These non-verbal signals along with everything mentioned, finish a portrait to make it flattering and genuine. If a portrait seems off, but visually looks fantastic, the problem is likely poor or mixed body language.
What Makes A Good Portrait – Technical Settings

The last aspect of what makes a good portrait is the technical settings chosen by the photographer. You could have great light falling on your subject in the perfect location with beautiful framing. If the capture is over exposed though, none of it matters. This is why technical settings are a cornerstone of every great portrait.
Technical settings include things like the choice of shutter speed, aperture, iso, strobe settings, lens choice and post processing. Assuming the exposure and focus are reasonably justified, there’s actually a ton of variation of what would make good technical choices for portraits. The variation is the artistic decision.
That said, there are a few basic technical aspects that always lead to higher quality photos.
With regards to exposure, you’ll always have the most control when your camera and lights are set to manual. This keeps the tools from making any decisions and allows complete control over what to expose for. Also, lower iso always yields higher quality photos, as does capturing the images in RAW format.
“Good” technical settings depend on the situation the portrait is captured in and the desired final outcome.
To illustrate this point, studio portraits submitted for competition usually score higher if detail is retained in both the shadows and the highlights. Wedding portraits on the other hand need to be captured in a much shorter time frame. This means it’s generally acceptable to have blown highlights or clipped shadows so long as it’s done artistically and with intention.
The bottom line is that good portraits aren’t dictated by specific settings. What makes a good portrait is when the technical settings chosen compliment the other core elements of the photo. If the technical settings distract from the location, lighting, composition or expression, they are likely not well executed.
Conclusion
In conclusion, there are 5 core elements that make up a good portrait: Location, lighting, composition, emotion and technical settings. When all 5 of these elements are well executed, a great portrait is created. If any of these elements comes up short, the quality of the portrait suffers. A fanatic obsession with good implementation of these elements will lead to better photos, and more consistent portraits.
I hope this post helped answer the question of what makes a good portrait. My goal was to articulate all of the elements I think make up a great photo to help you determine what a good portrait means to you. If you like my philosophy and would like to book a photo shoot with me, feel free to reach out and I’d be happy to make that happen for you!
If you found this article helpful, you can share it using the orange button in the lower left corner. Think I missed something? Please share your thoughts in the comments below so I can improve this post and make it better for everyone.

I loved this article
Glad you found it helpful 🙂
It has been so helpful indeed, and I have liked your articles man. Thanks
Welcome! Glad you found it worth the read!
So happy to have read your 5 steps
I was very empress with your description of showing emotions in a portrait and would like to use your description in an article I’m writing for training wranglers in portrait photography.
I would use it as a quote. giving you credit and your web page as a reference.
Thanks David! Ya no problem, you can quote this post if you’d like! What’s a portrait photography wrangler? The link you submitted was broken 🙁