Even if you have a beautiful portrait hanging on your wall, the photo will never look great unless you learn how to light pictures on the wall like an art gallery would.
In this post I’m going to share some general tips for lighting pictures on your wall. I’m also going to share two lights I personally use for illuminating wall art in my own home. The first is an affordable and surprisingly awesome battery powered option for those on a budget. The second is my favorite hardwired option for those that want the best results.
Before I share which lights to get, it’s important to first go over a few tips so your photos look fantastic regardless of which option you choose.
Photo Paper
Before we talk about what lights to get, it’s important to first make sure your final artwork is printed on cotton fiber fine art paper or better. For best results you’ll also want the piece printed with a machine capable of 10 base colors or better. This gives the print a wider color gamut then the more affordable fuji luster paper which is CMKY. When left un-coated, these prints are non-reflective, which is really helpful when you’re looking to shine a light on it.
Angle
The angle of the lighting in relation to the artwork matters. This is why I dislike picture lights that hang above the photo. This top down angle of the light is generally unflattering for faces, and I find the same is also true when illuminating pictures on the wall.
In most cases the light you choose should be attached to the ceiling and placed far enough into the room to allow for roughly a 30 degree angle. This will broadly light the picture without introducing aggressive top down shadows. This angle will also help minimize reflections which can negatively impact the viewing experience.
Power
The power of the light matters first in being able to see the picture adequately and also helps tie the room together. The power of the light should be bright enough to illuminate the photo in both day and night time lighting conditions. Ideally the picture light should be about 2-3 times brighter then the ambient light in the room. This will help make the picture pop as a focal point in the room without feeling overbearing.
Lights for Illuminating Pictures on the Wall
Now that you know the basics for how to light pictures on the wall, the following are the lights I currently use to illuminate artwork in my home. The Leastyle is a cheap, battery powered LED light anyone can install while the J.Lumi gives the best results I’ve discovered so far.
Also, this post may contain affiliate links, meaning I get a commission if you decide to make a purchase through my links at no cost to you. Please read my disclosure for more info.
The Leastyle spotlight is perfect for those who rent or anyone on a tight budget. They are surprisingly awesome (especially for the price) and are super easy to install since they’re powered by 3 AA batteries. You can mount them using the supplied adhesive or mollies depending on your circumstance.
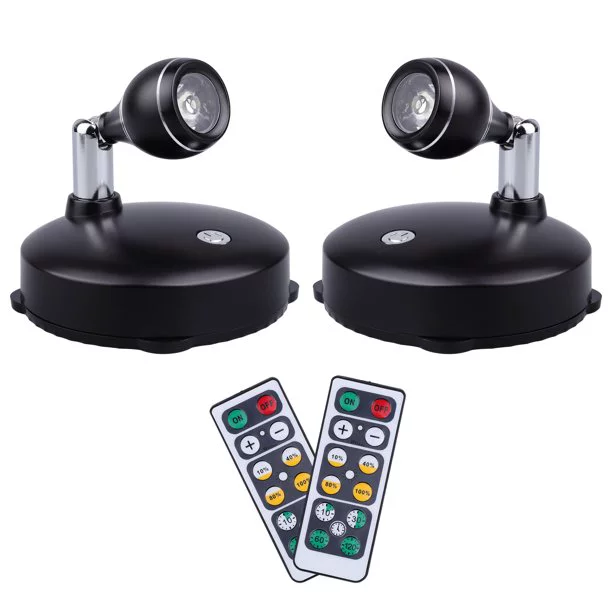
I’ve had 4 of them now for about 2 years and they all still work. Even if one did fail in the near future I’d still think highly of them as it wouldn’t exactly put a dent in my wallet to get another.
As for performance, on fully charged enoloop batteries I am definitely not getting the claimed 50hrs out of them, but they last a good 24 Hrs at full power before they’re noticeably less bright.
At night we use them at half power and get about 5-7 days per charge. This is pretty good battery life, but also means that if you’re not willing to do rechargeable batteries, these lights might not be a good choice for you.
They claim 80 lumens of brightness out of these, but I’ve never put a light meter on mine. My lights are mounted about 4 feet away from my prints to allow for the 30 degree angle and they don’t feel under powered on any print 16×20 or smaller. Bigger prints will need 2 lights unless a heavy vignette doesn’t bother you.
In short, illuminating a picture on your wall with one of these will make you love it infinitely more than having nothing at all. In our house, they create perfect ambient lighting for movie nights in our living room in addition to making the prints stand out. My wife likes these lights so much that she still occasionally comments on them all this time later.
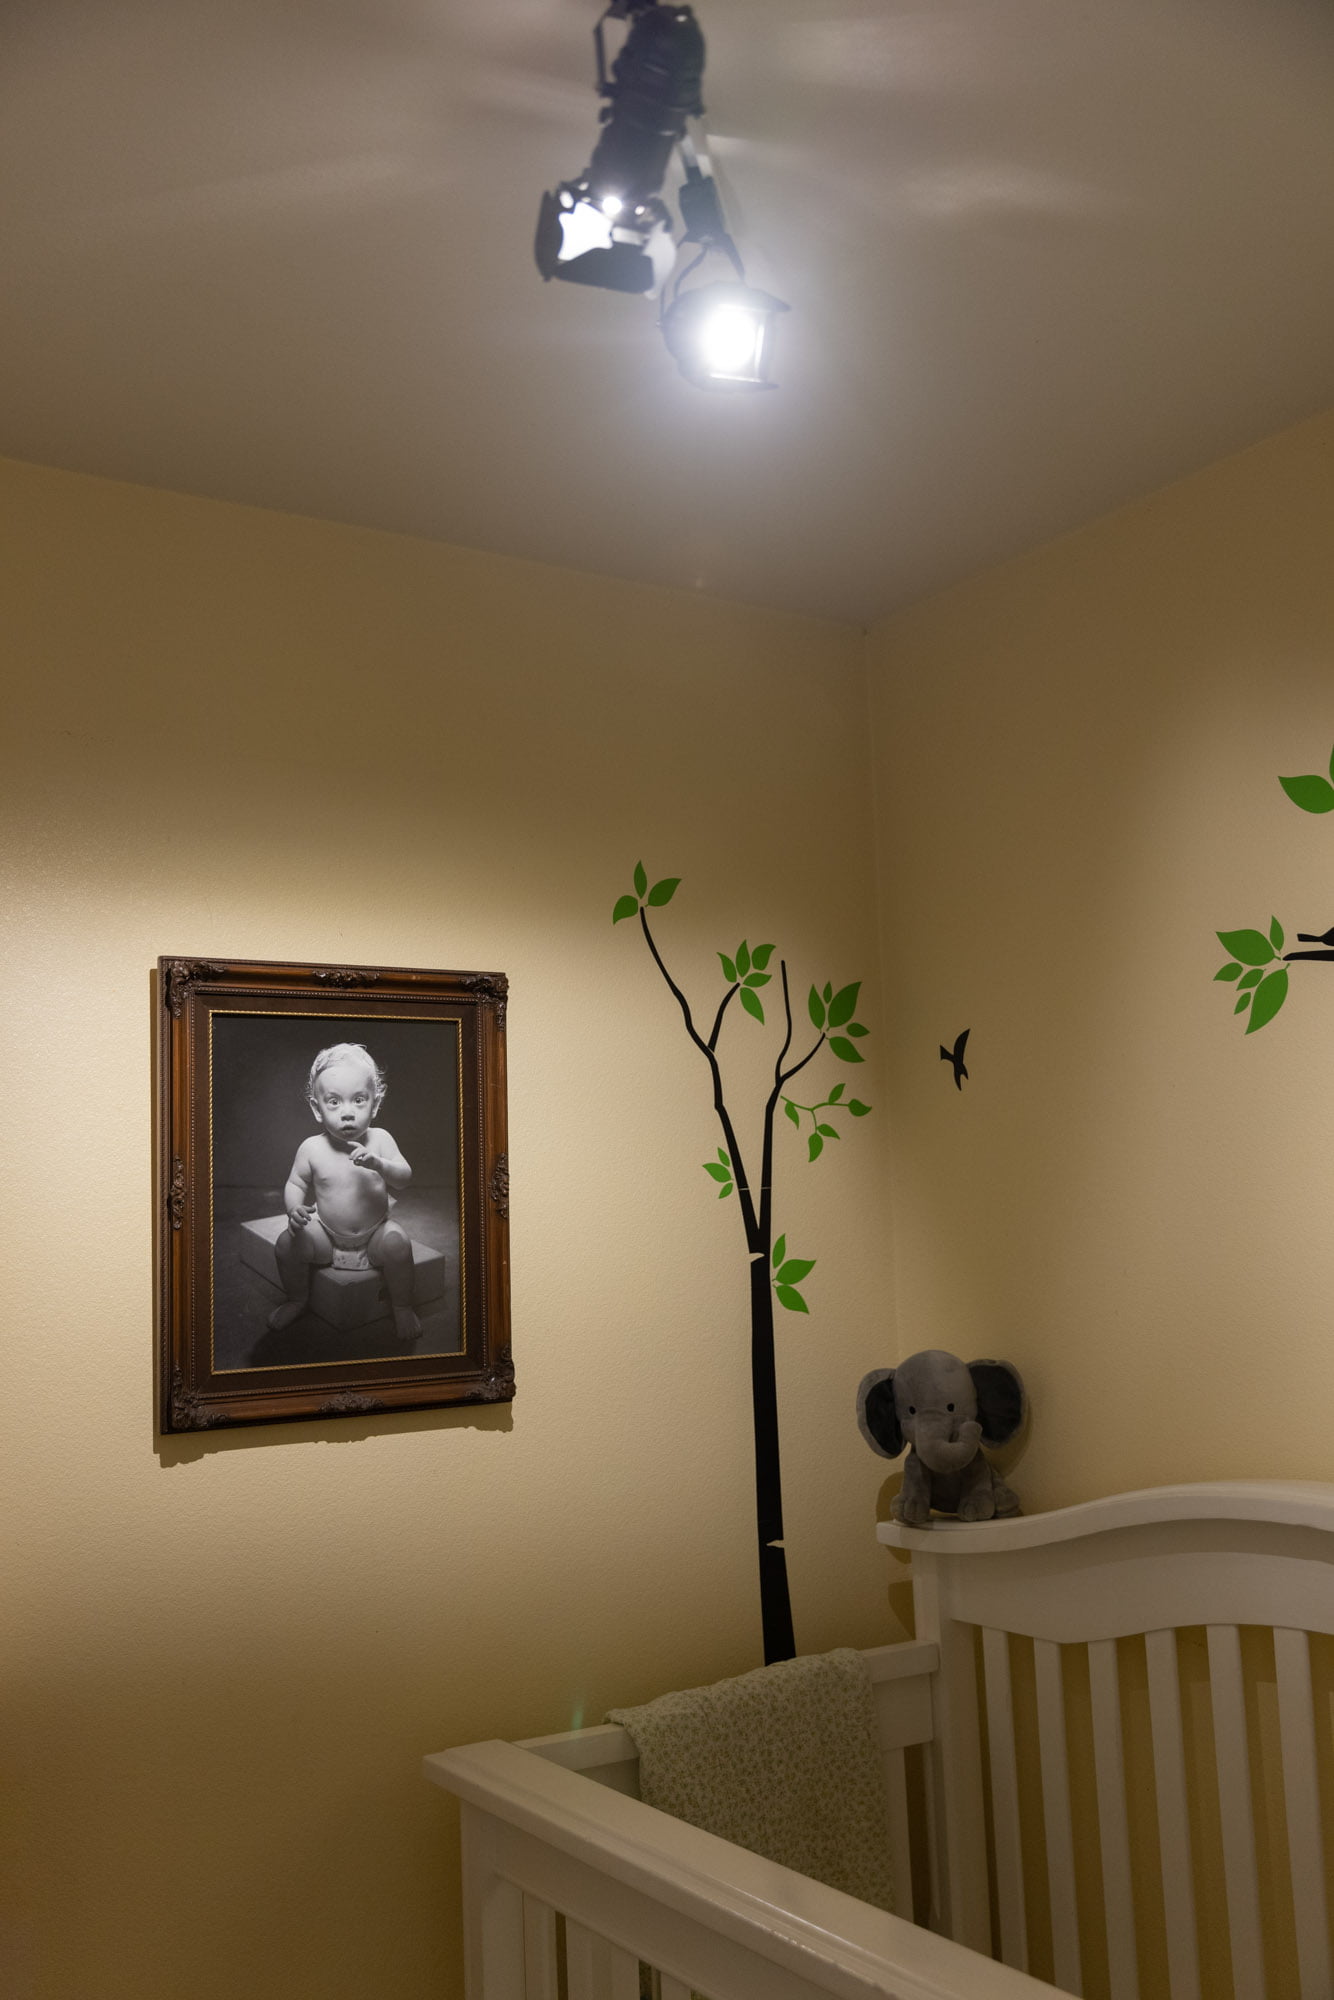
These are my favorite lights to illuminate pictures on the wall. The J.LUMI TRK9000 is a track light head and thus will require some minor wiring to install. That said, once these heads are installed, they will outperform any battery powered light on every level excluding cost.

The J.LUMI lights come with LED bulbs capable of producing 550 lumens. By comparison, this is almost 7 times as powerful as the battery operated Leastyle lights mentioned earlier.
Power aside, the main selling feature of these heads is in how you are able to modify the light. The bulb can move forward and backward in the housing to focus or widen the beam. You can also further control the light with the barn doors. This allows you to precisely illuminate just your picture and nothing else.
Awesome isn’t a strong enough word to describe these heads having used them daily for about 4 years now. I’ve personally constrained the light from these on photos as small as 14”x18.” I’ve also found them to be powerful enough to handle a framed 36”x48” portrait with almost no light falloff.
It should be noted that the supplied LED bulbs aren’t capable of being dimmed. Fortunately you can simply change the bulbs to halogen if you need this capability. That said, this will only allow you to dim all of the lights on each circuit, so you won’t have control over each head. This becomes problematic if the lights are different distances from their respective pictures.
Conclusion
In conclusion, if you’re okay with the added cost and effort of hard wiring your lights in, the J.LUMI heads are hands down the best way to light pictures on the wall. They are very powerful and offer better light control than anything else I’ve discovered.
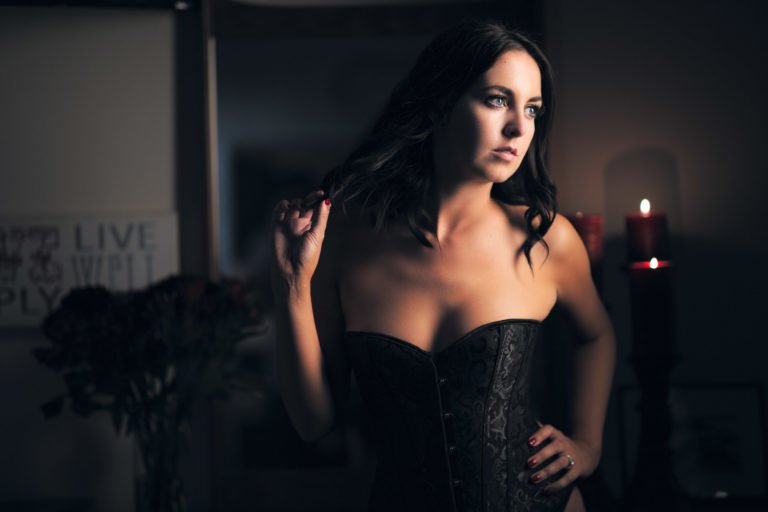
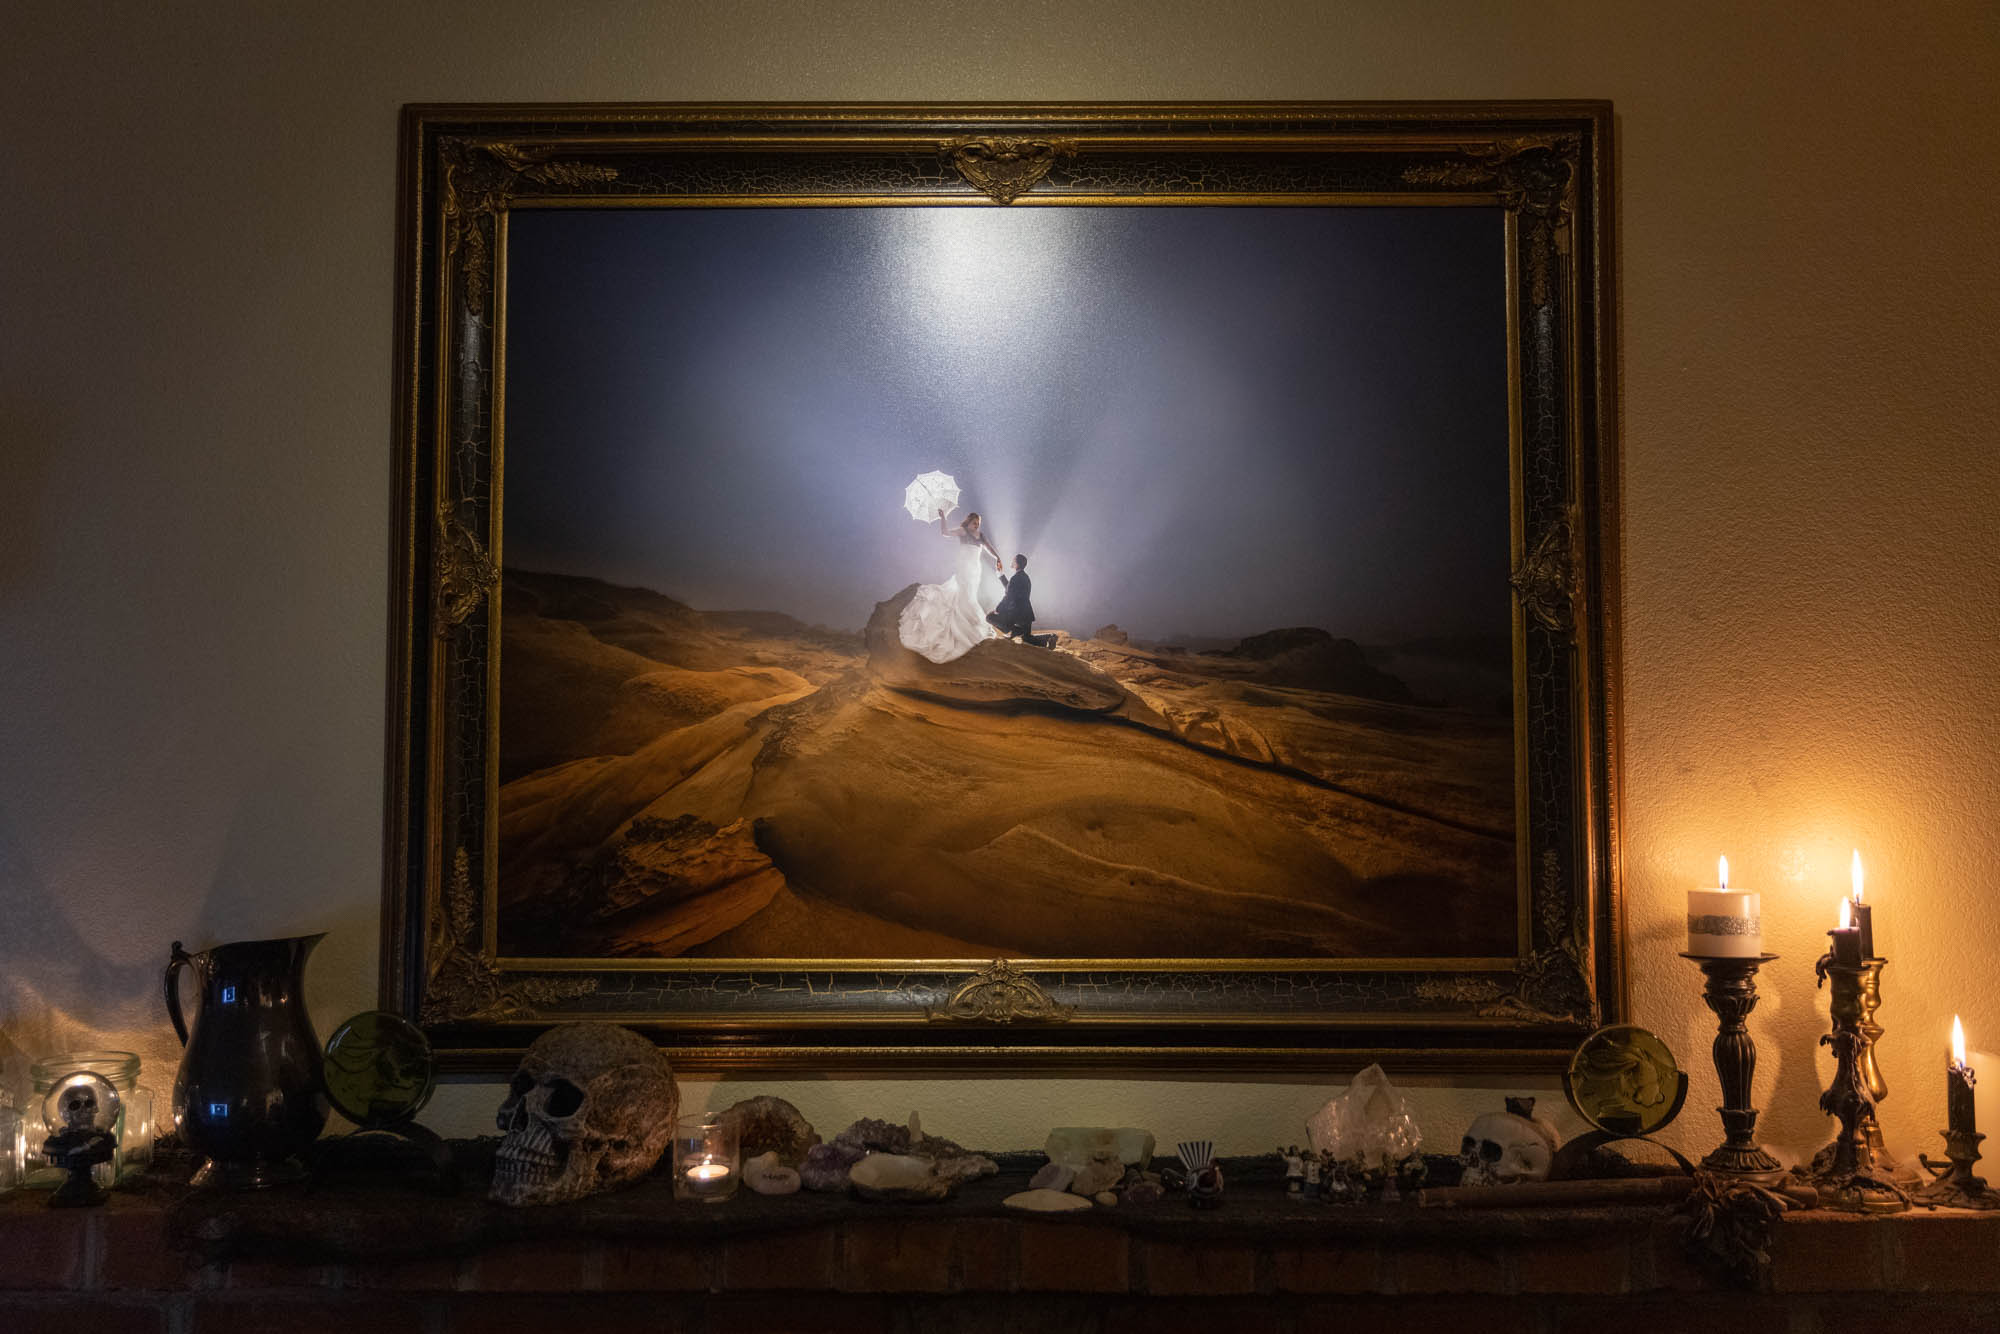
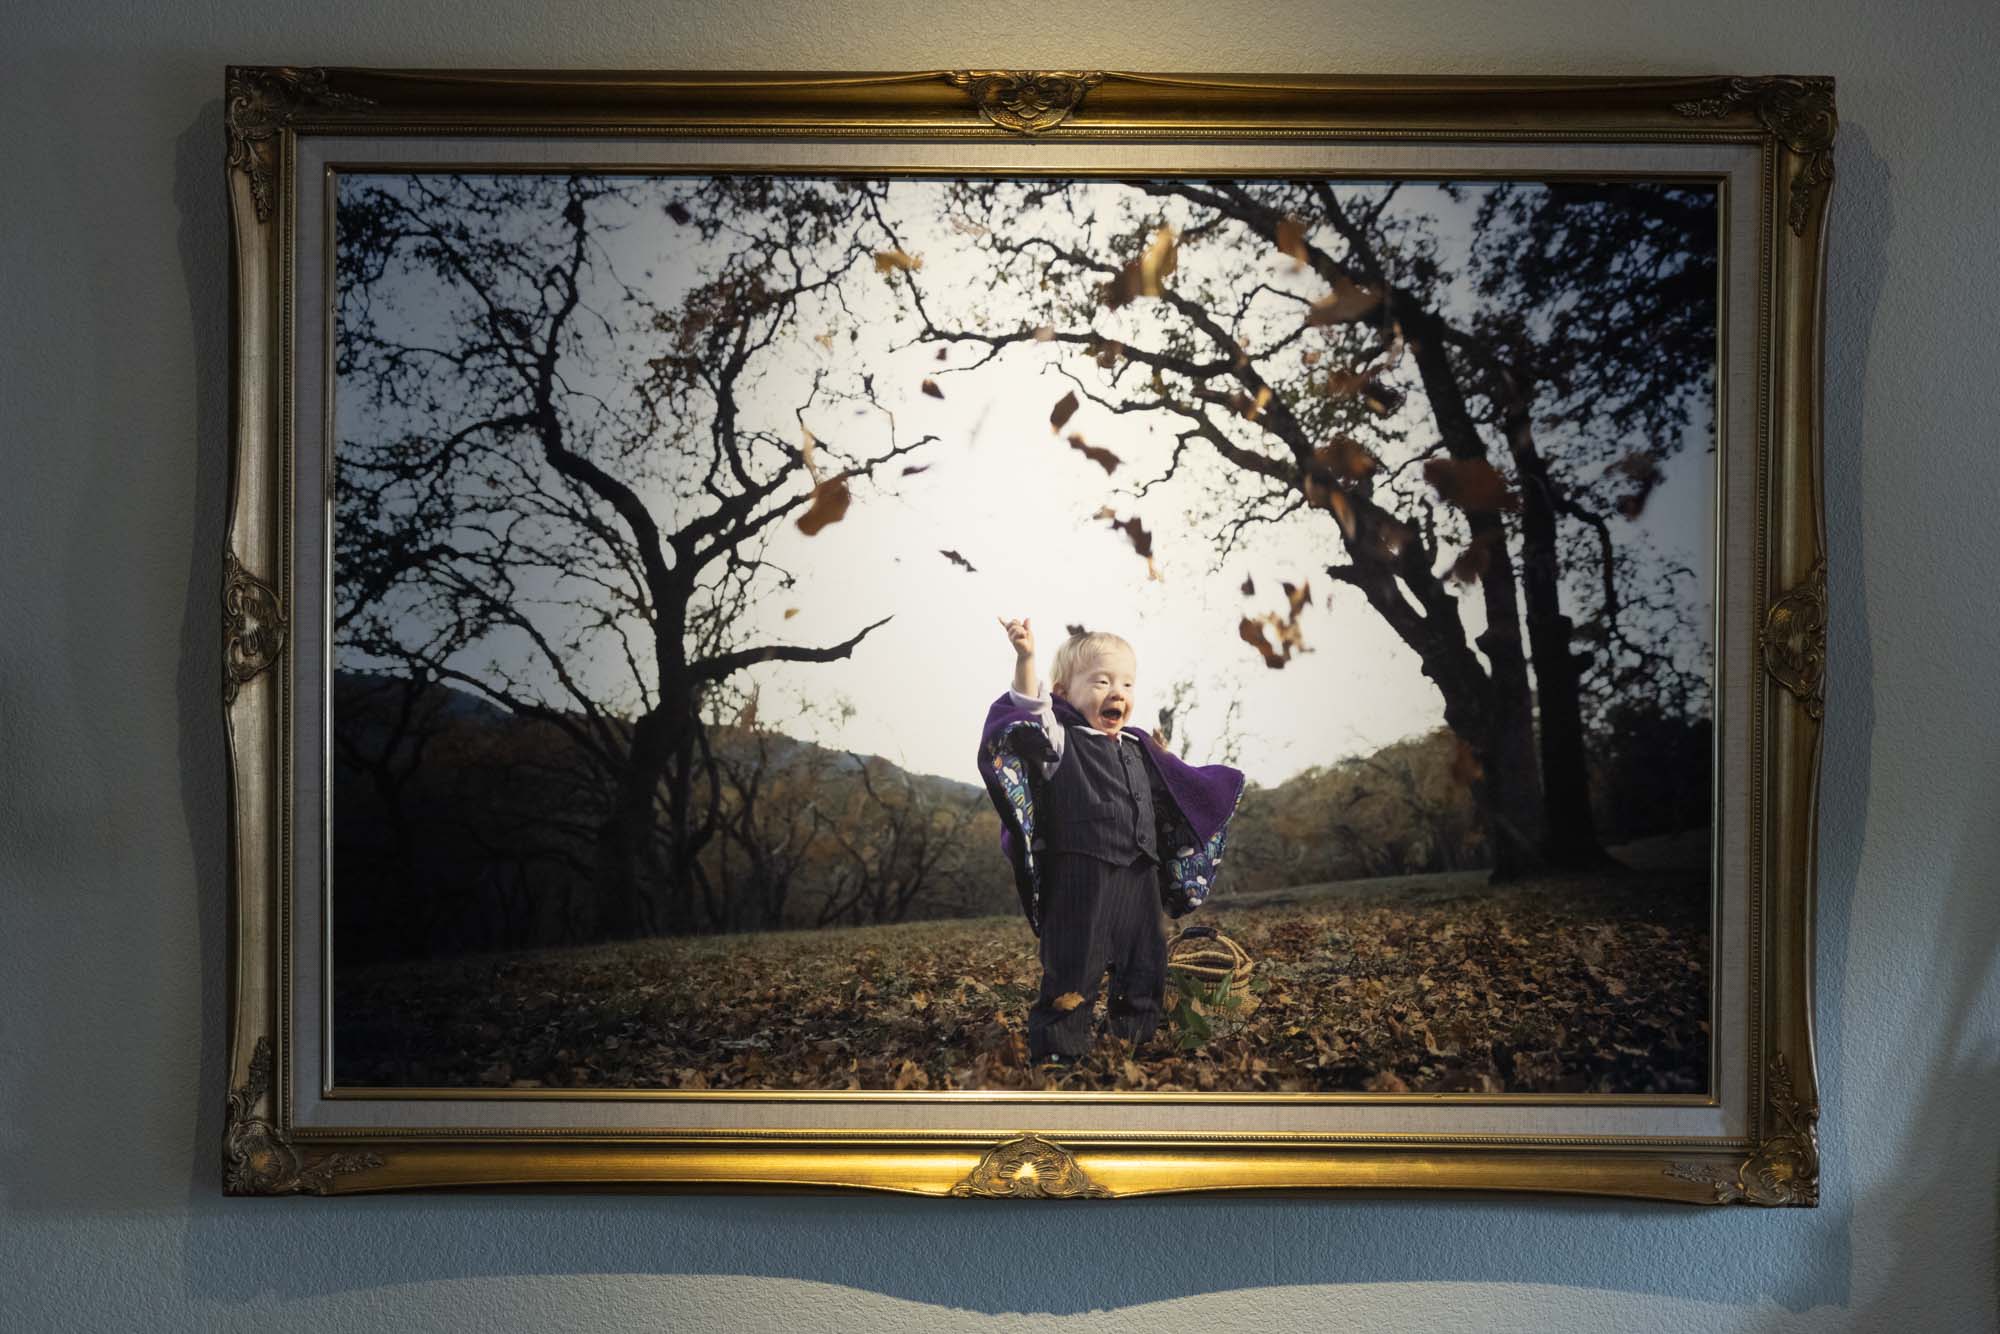
The following photos were captured under one J.LUMI head each:
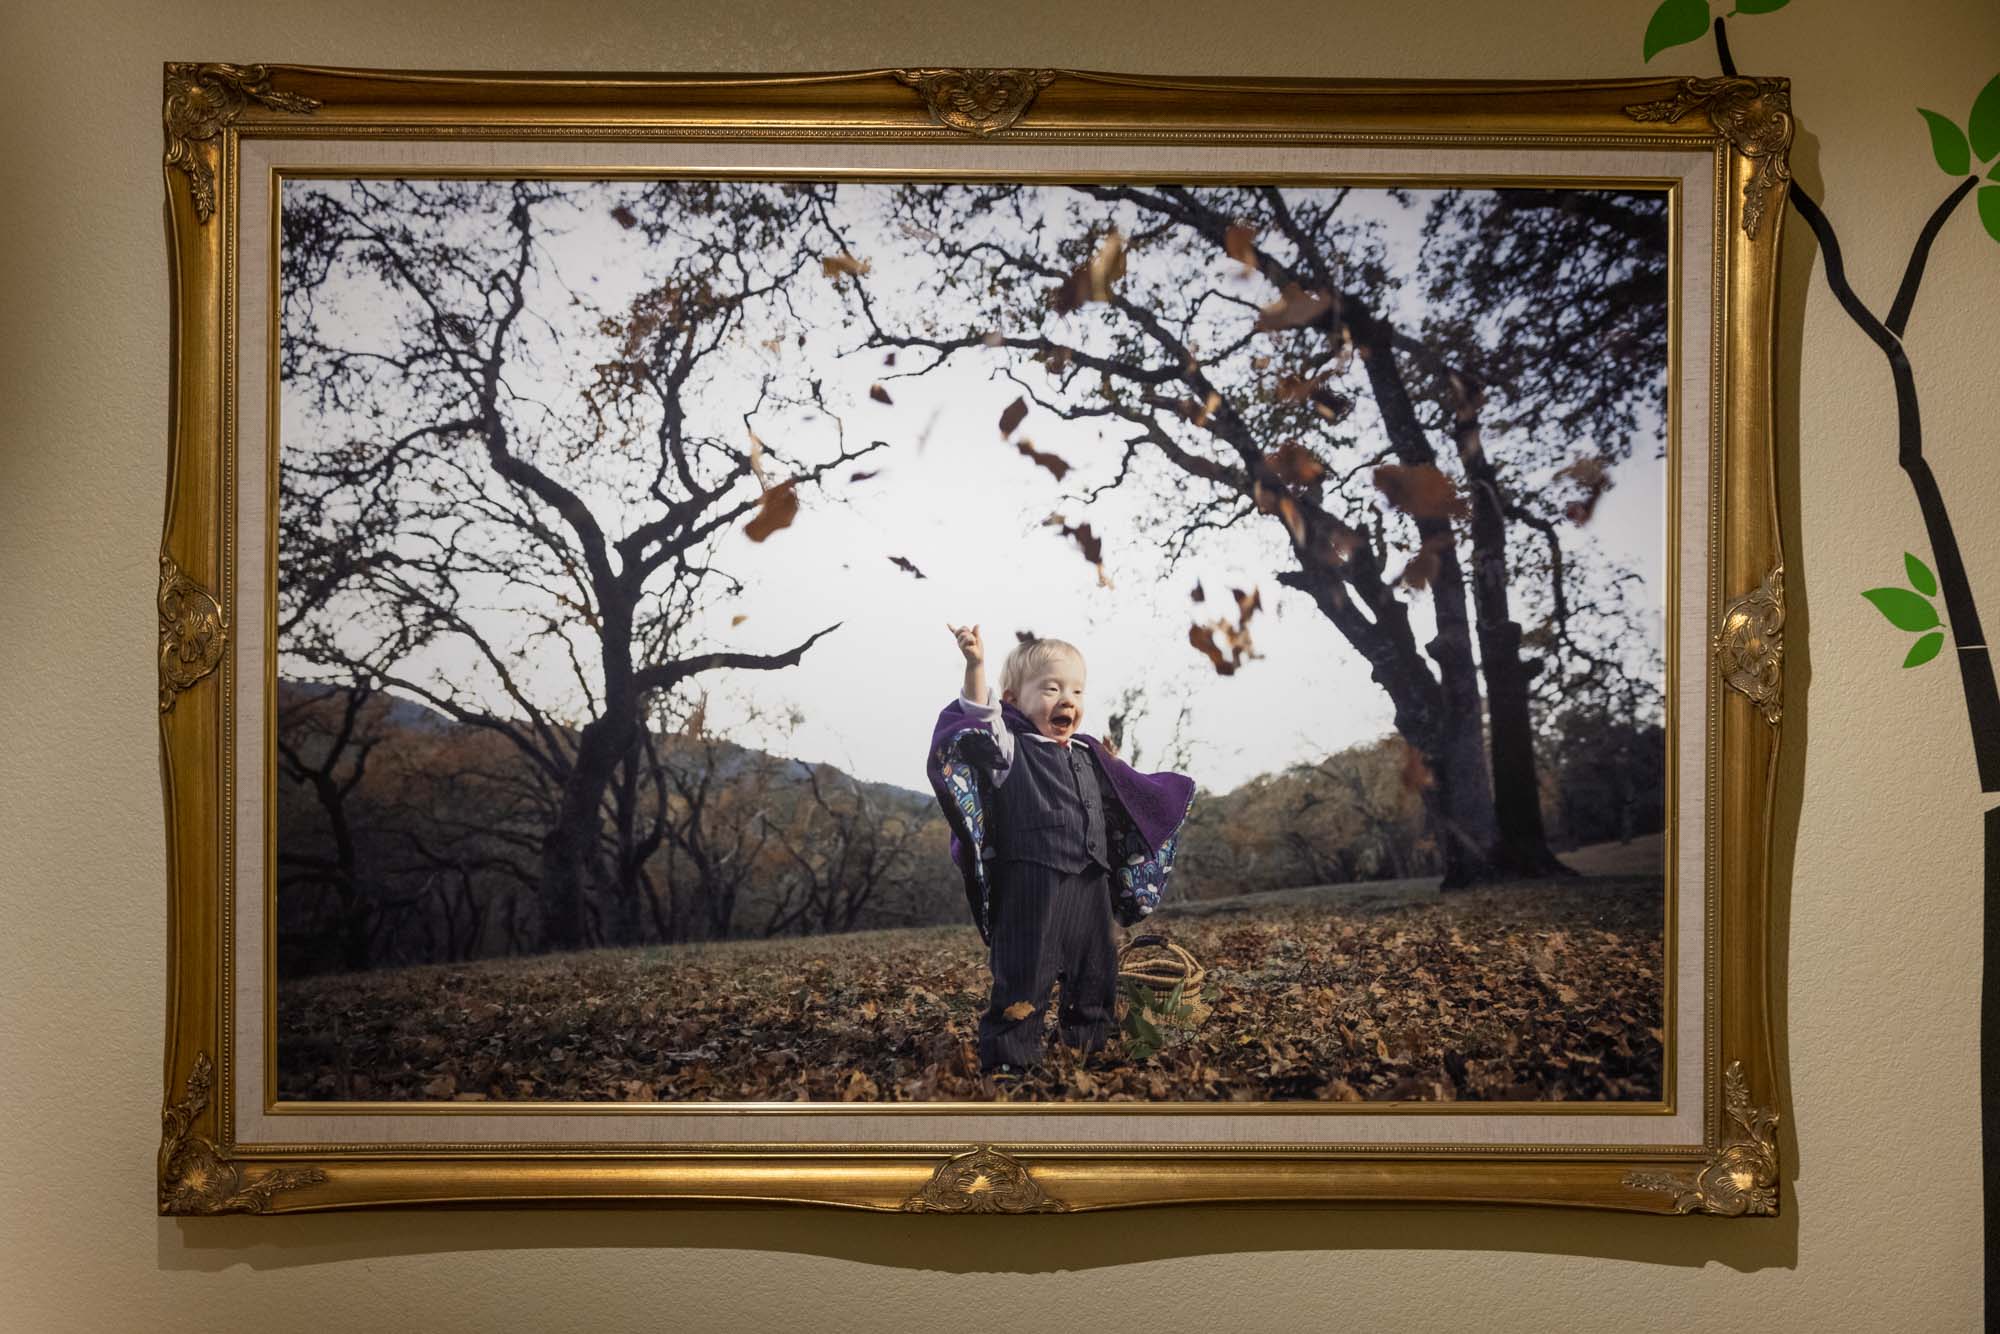

If you rent your home, are short on cash, or lack the skills to hard wire lights in, you will love the Leastyle lights. Just make sure to get some rechargeable batteries if you decide to go this route as you will be changing them often.
Also make sure to get multiple lights for larger prints as the light falloff becomes very noticeable with one light. You can compare the light falloff with one Leastyle light on the 24″x36″ and 14″x18″ examples below.
The Following photos were captured under one Leastyle light each:

Did I Miss Anything???
I want to make this the best resource I can for everyone looking for information about how to light pictures on the wall. If you have experience with another great light that I didn’t mentioned here in this post, please let me know about it in the comments! I’d love to try it!