There are countless ways to light women for boudoir photos, and understanding these can be overwhelming for beginners. To demystify this process, this guide will introduce you to some easy boudoir photography lighting setups. These will empower you to produce awe-inspiring portraits in your upcoming photoshoots.
In this post we’ll cover:
- Boudoir Lighting Ideas
- Boudoir Lighting Gear
- Boudoir lighting Diagram For Natural light
- Boudoir Lighting Setup Using Studio Lights
This post may contain affiliate links, meaning I get a commission if you decide to make a purchase through my links at no cost to you. Please read my disclosure for more info.
Boudoir Lighting Ideas
Understanding the Quality of Light for Boudoir Photography
The first step in mastering boudoir lighting is to appreciate the nuances of good lighting. Soft, diffused light can elevate your photos, reducing harsh shadows that might highlight imperfections. Tools like diffusers or even bouncing your flash off white surfaces can help achieve this softness. Reflectors, especially white ones, can further enhance the quality of your shots.
For beginners reading this, it’s crucial to realize the power of natural light. I often rely on it during my photo sessions, positioning my clients to make the most of the ambient light at the shoot location. Beyond this, candles, string lights, and other household items can add character to your shots. They can serve as both primary light sources and as tools for creating background interest. But, if you feel limited by natural light, remember that we have a plethora of affordable lighting gear available to us these days.
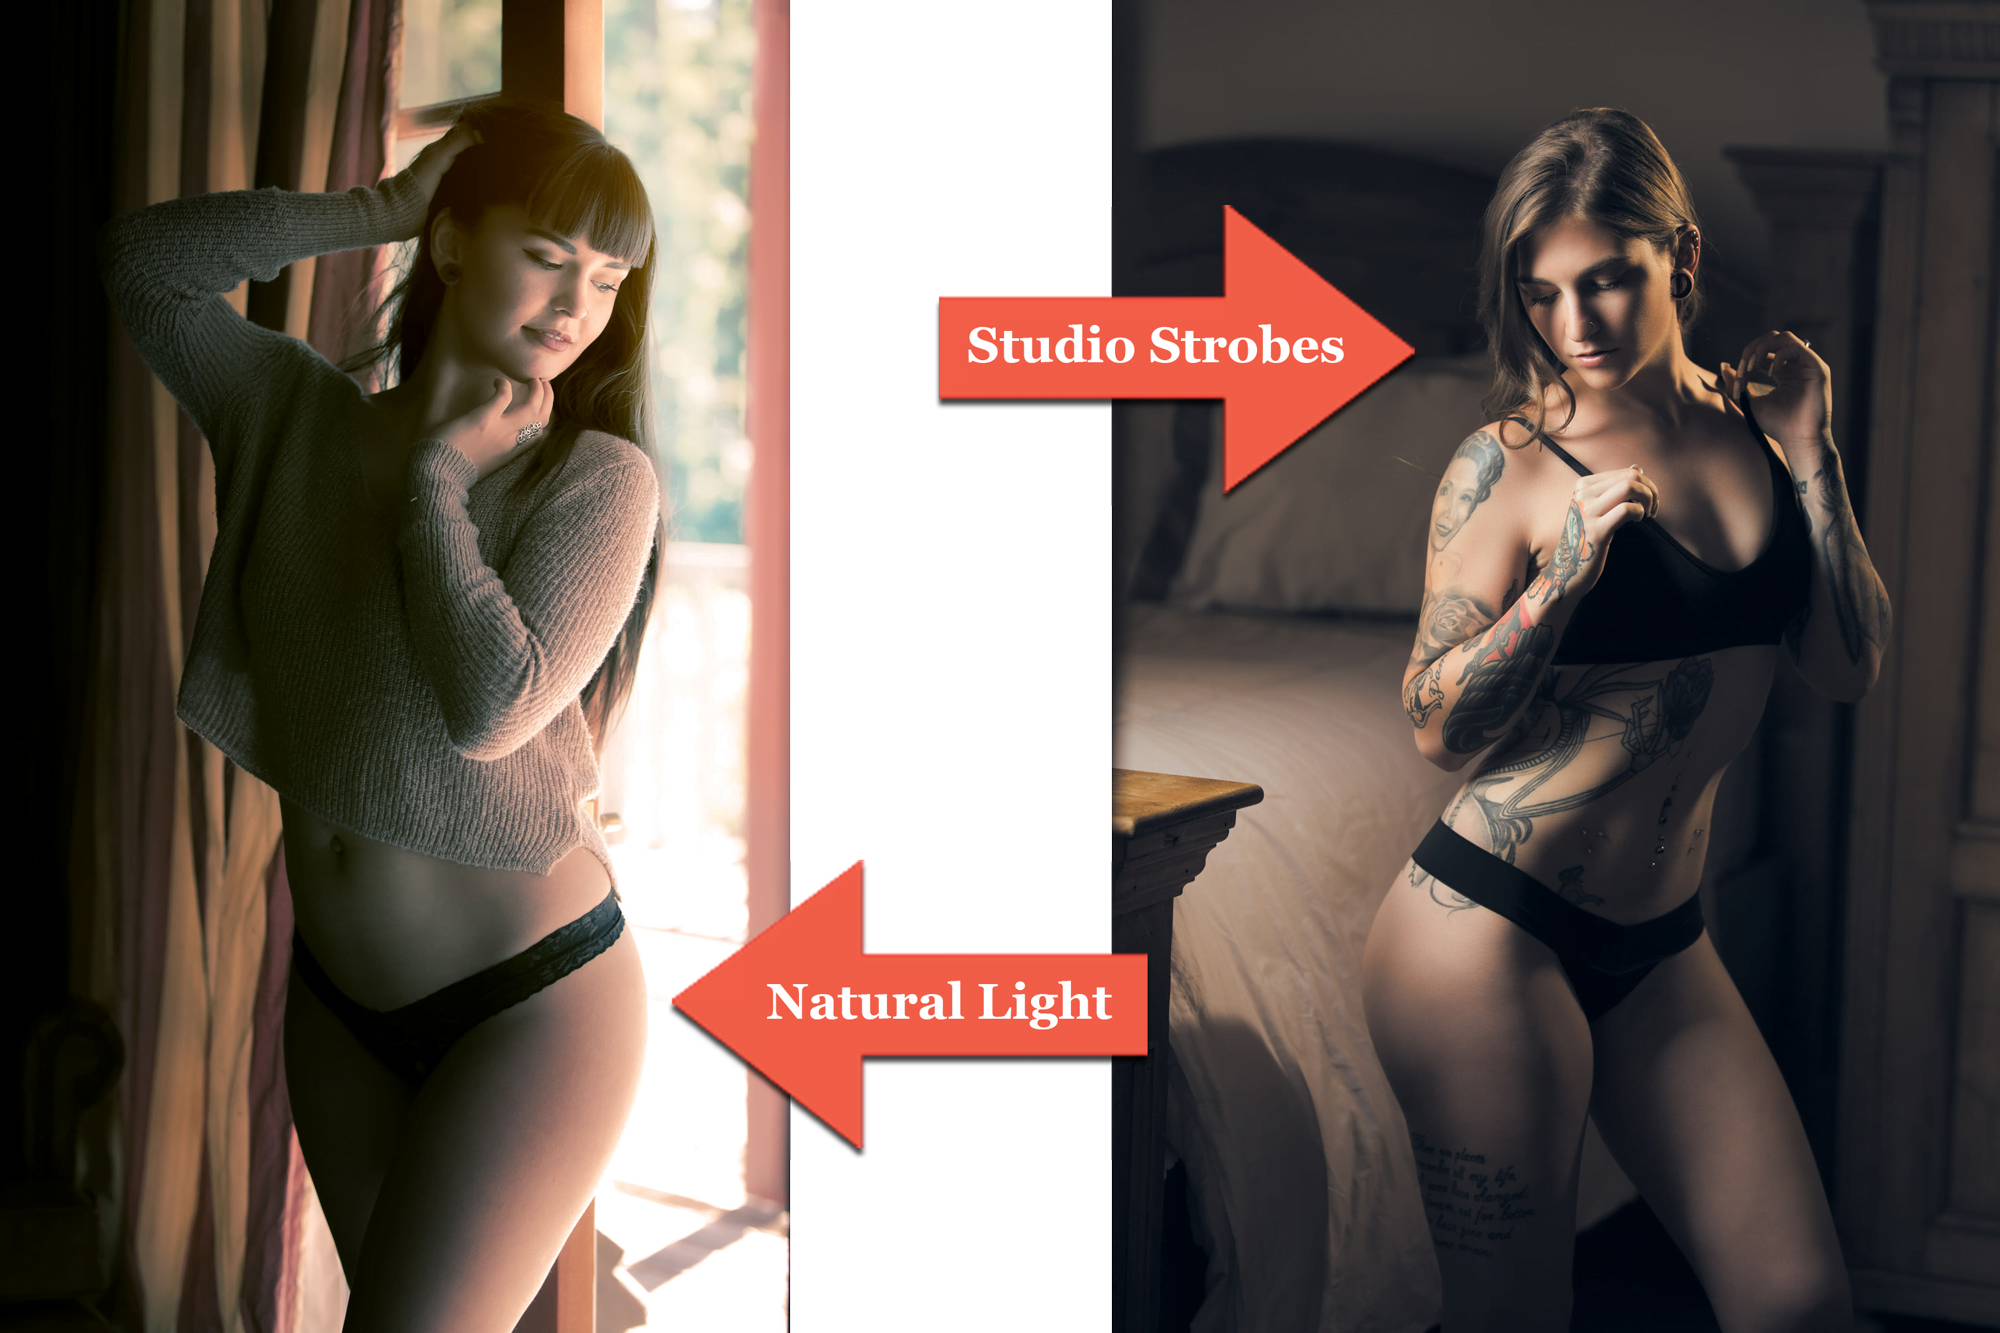
Natural Light vs. Studio Light: The Eternal Debate
Natural light can be magical on it’s own or it can be incredibly limiting depending on the circumstance. Studio lights, when used with finesse, can provide the highest quality captures. LED wands and other continuous lights are great low cost lights excellent for seeing the final look in real-time. They may not be as powerful as strobes but can produce striking results in the hands of a skilled photographer.

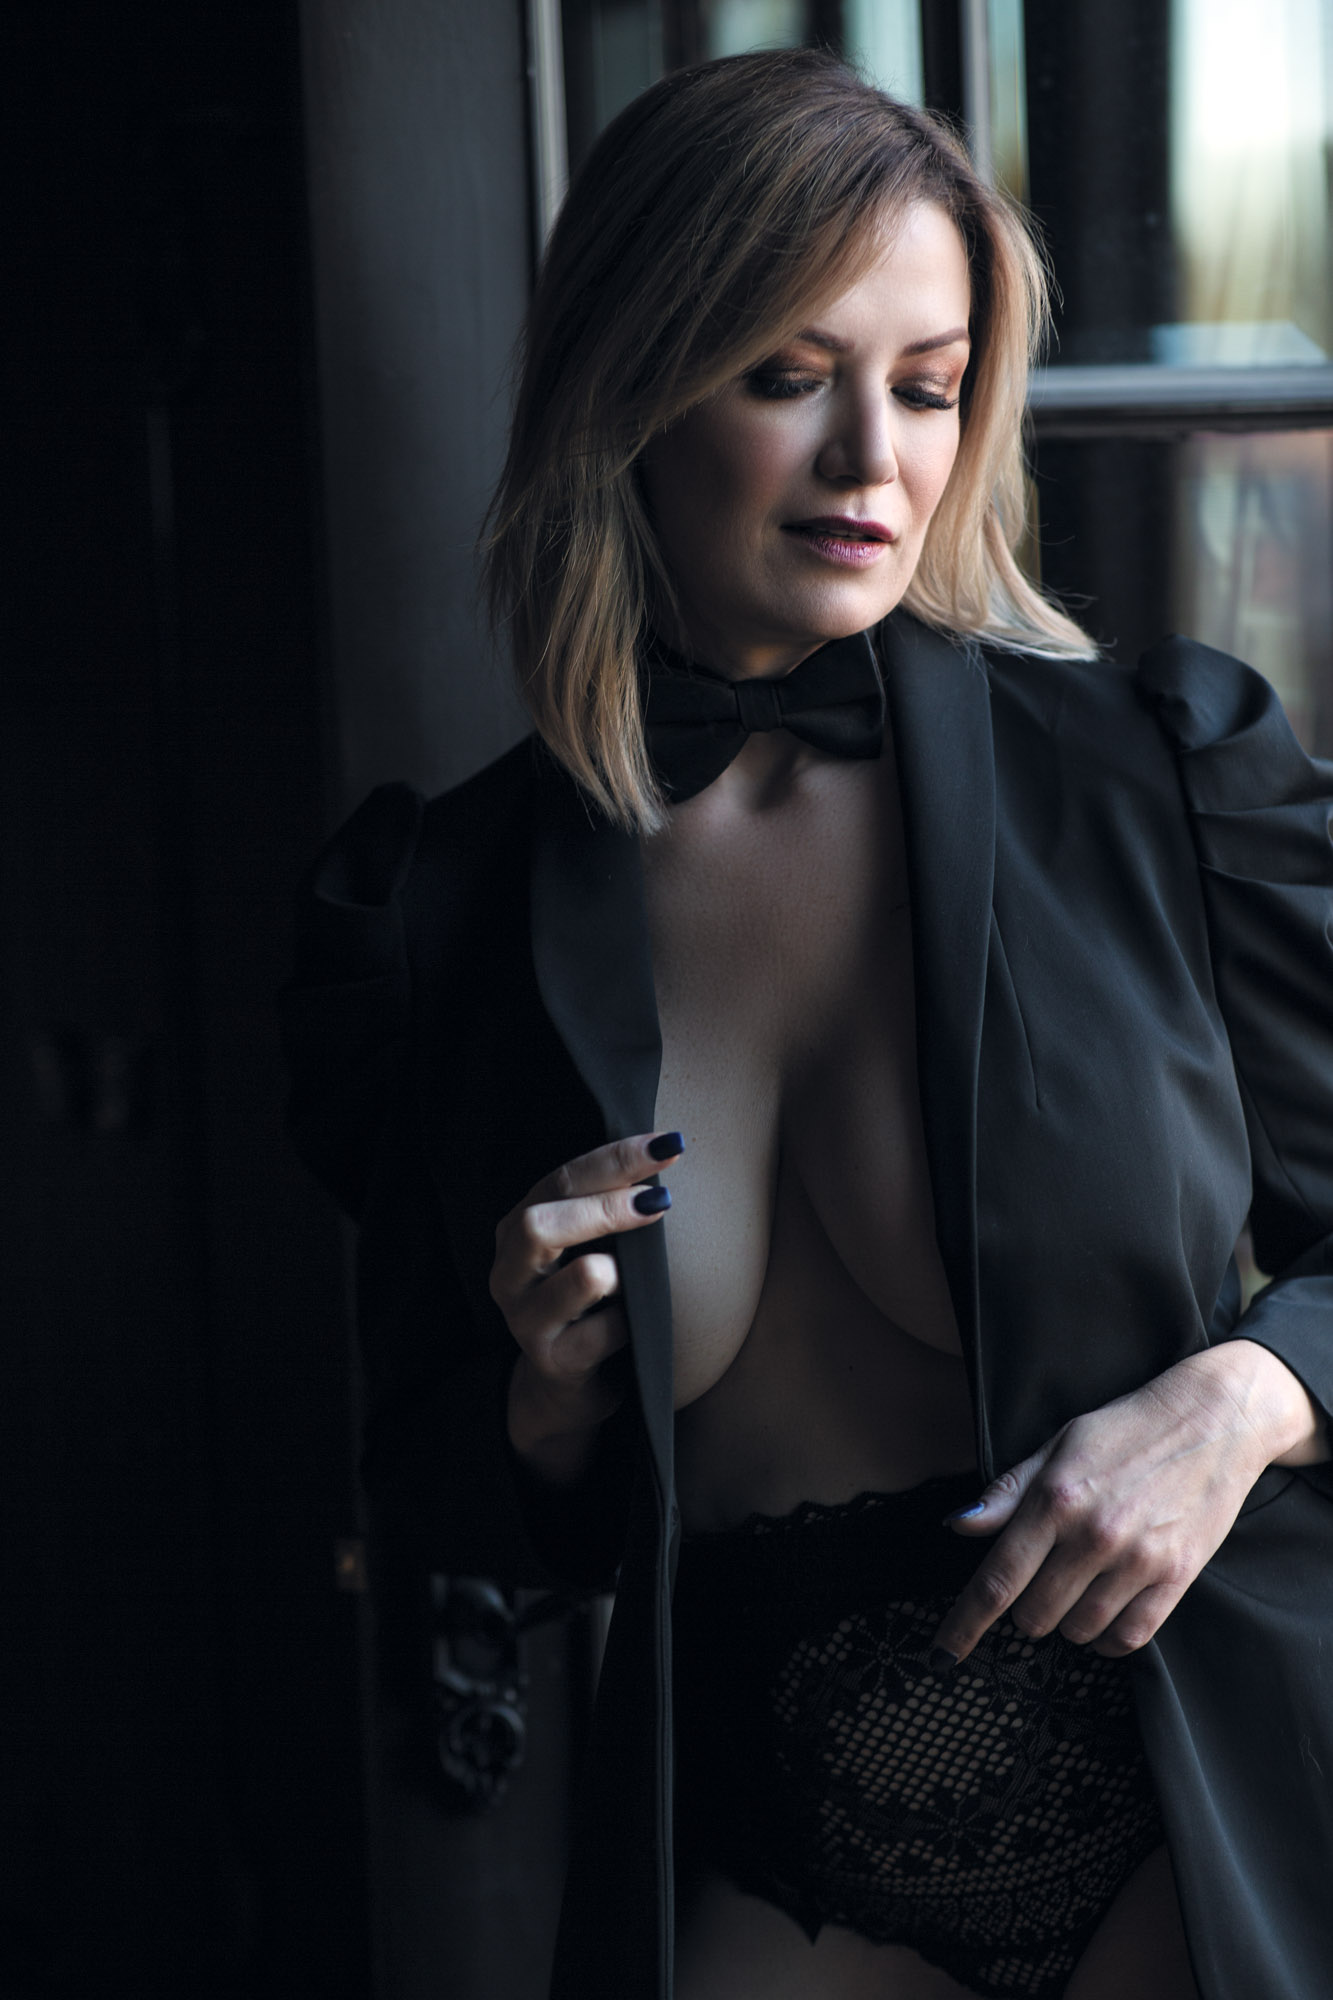
Positioning Your Subject: Make the Most of Natural Light
Leveraging natural light effectively is more about understanding positioning. Windows, especially those facing north, can be your best ally. They offer gentle, consistent light. However, if you’re willing to experiment, even the sharp light from southern-facing windows can be used for a dramatic effect.


Boudoir Lighting Gear
Photography, at its core, is an interplay of light and shadows, and having the right gear can make a significant difference in the outcome.
The Essential Monolight: While I’m a staunch advocate for the beauty of natural light, the versatility of a monolight cannot be understated. If calamity struck and all my equipment vanished overnight, while I’d still bank on natural light for a session, I’d sorely miss having at least one monolight. It provides an incredible breadth of control over the illumination of your subject. During my sessions, I often rely on a single monolight studio strobe, although based on the nuances of the shoot, I’ve employed up to four.
However, setting up a 4-light kit can be a substantial investment for beginners, especially when considering premium brands. If funds are tight, start with one monolight and incrementally add to your collection. But, if even a single monolight seems like a stretch, consider other potent alternatives like an LED light wand or a video light.
Monolight & Modifier Examples
- Godox AD600 Pro
- Angler Strip Box 1’x4′ / Grid for Strip Box
- Angler Octobox 36” / Grid for Octobox
- 7″ Reflector / Barn Doors / Grids
Diving into Continuous Lights: Monolights are incredible, but continuous lights like LED wands and video lights can be valuable too. While they might not pack the same punch as strobes in terms of intensity, they make up for it in real-time visualization. You can immediately see how the light plays on your subject, which is immensely helpful, especially if you’re in a dynamic environment.
Continuous Light Examples
Monolights, especially when paired with modifiers, offer unparalleled control. Their ability to shape, diffuse, and concentrate light is invaluable. Continuous lights, on the other hand, bring speed and adaptability to the table. While they may not be as modifiable as monolights, their immediate visual feedback can be a boon in fast-paced sessions. Each tool has its merits, and the key is to find what aligns with your vision for the shoot.
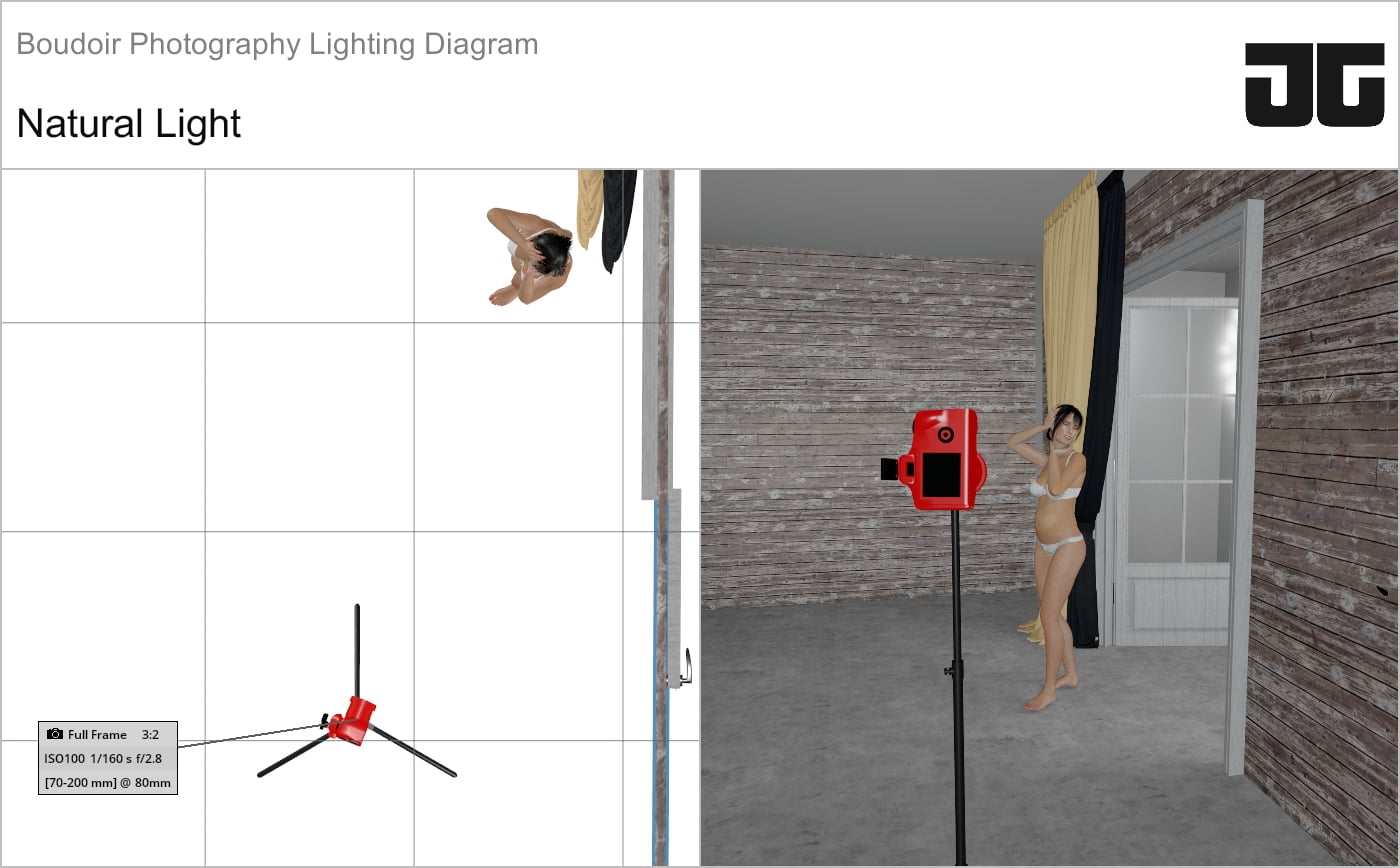
Boudoir Photography Lighting Diagram For Natural Light
Now that we’ve covered the different lighting you can use at your boudoir photoshoot, I’d like to show you a lighting diagram for natural light that I use at just about every photoshoot.
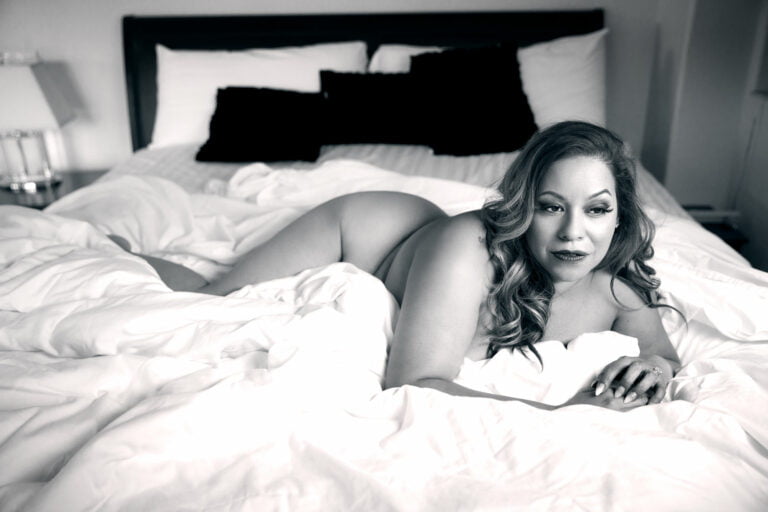
Whenever possible I always try to pose my clients into the natural light I find around me and capture them with that before I attempt anything with a strobe. The reason I do this is because it’s fast which allows me to create multiple looks quickly. Posing into natural light also forces me to get creative with my posing. This is because you’ll have to pose into these light sources as they present themselves.
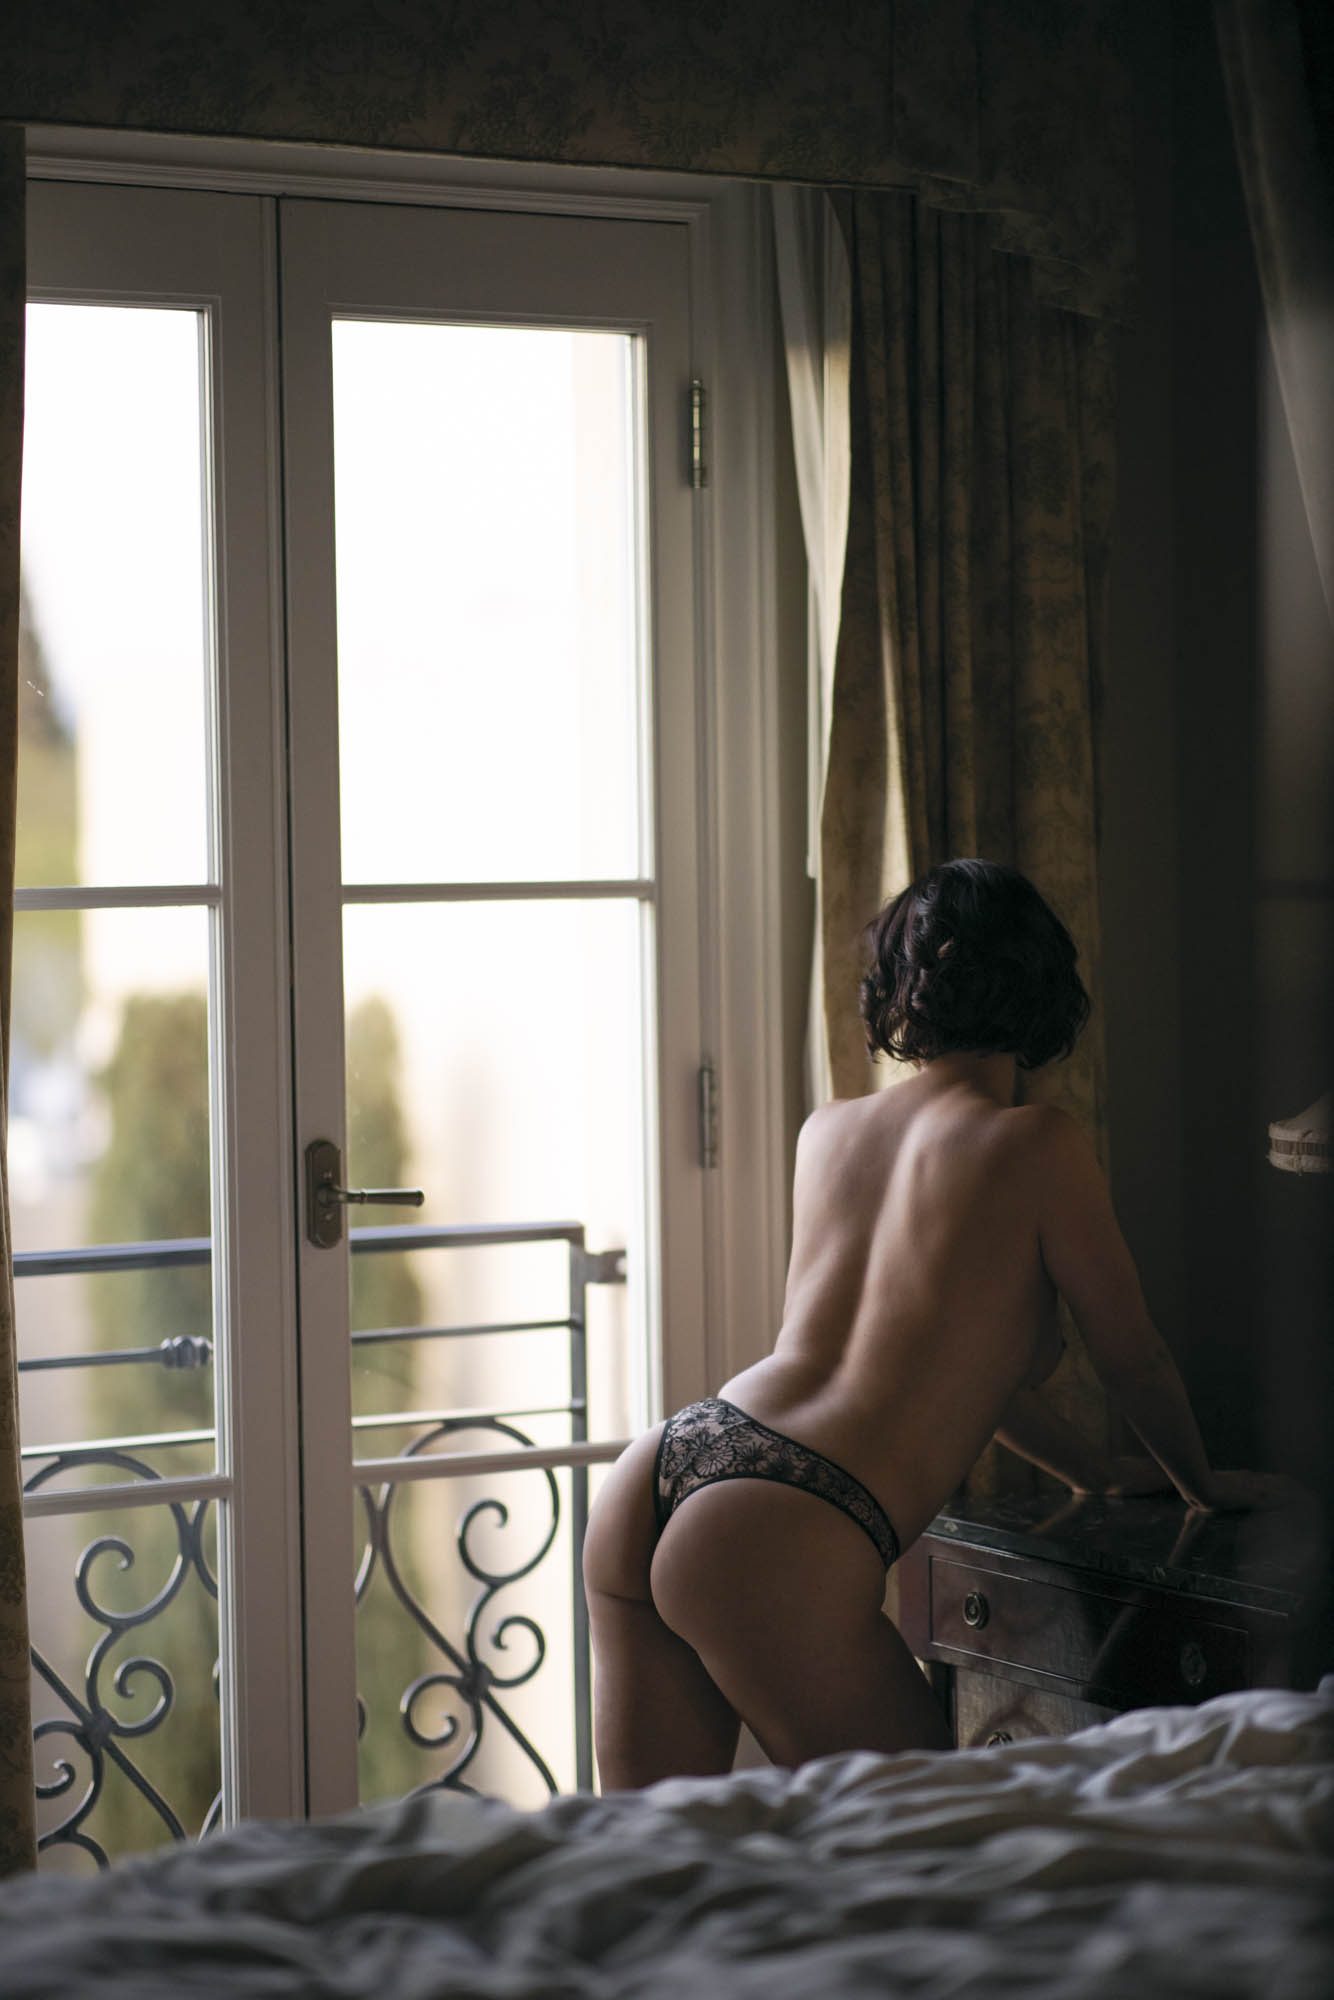
The easiest natural light source that is available to me in almost every space are windows. Keep in mind that northern facing windows will offer the softest light source as the sun will never directly enter these windows. These windows are best for beginners.
Alternatively, when I’m photographing women younger than 40 with nice skin, I personally prefer southern facing windows with full sun as this gives harsh moody lighting which I’m partial to. For beginners I recommend you stick with the northern facing windows if you have the option.
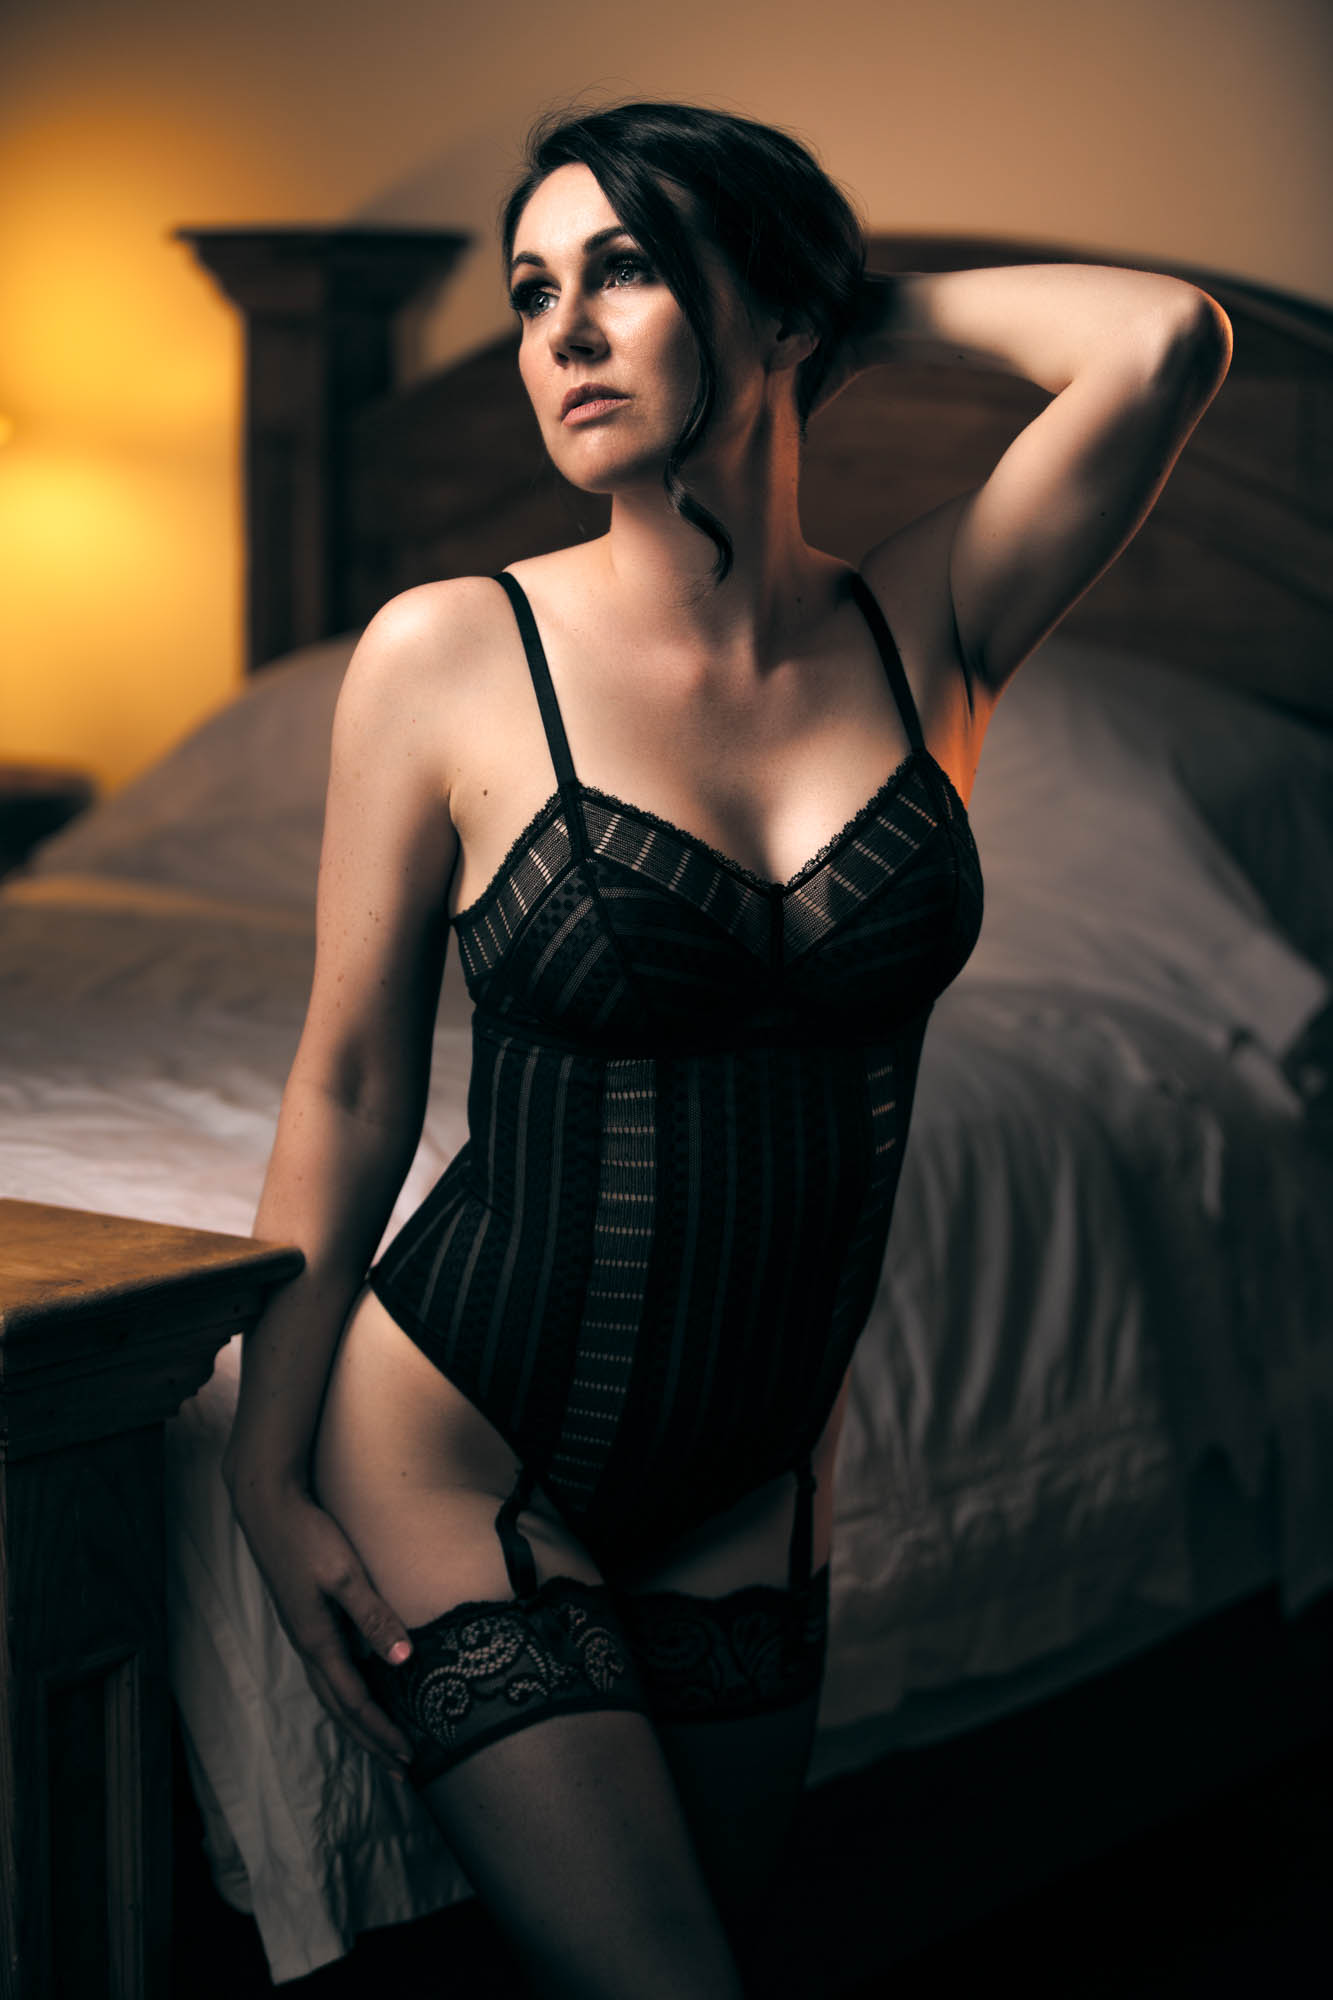
In any case my favorite way to use windows is as a cross light. By turning your client sideways to a window or door, you can pose flattering shadows onto the woman’s body and highlight her curves. The following is an example of how I do commonly position my clients for this look.
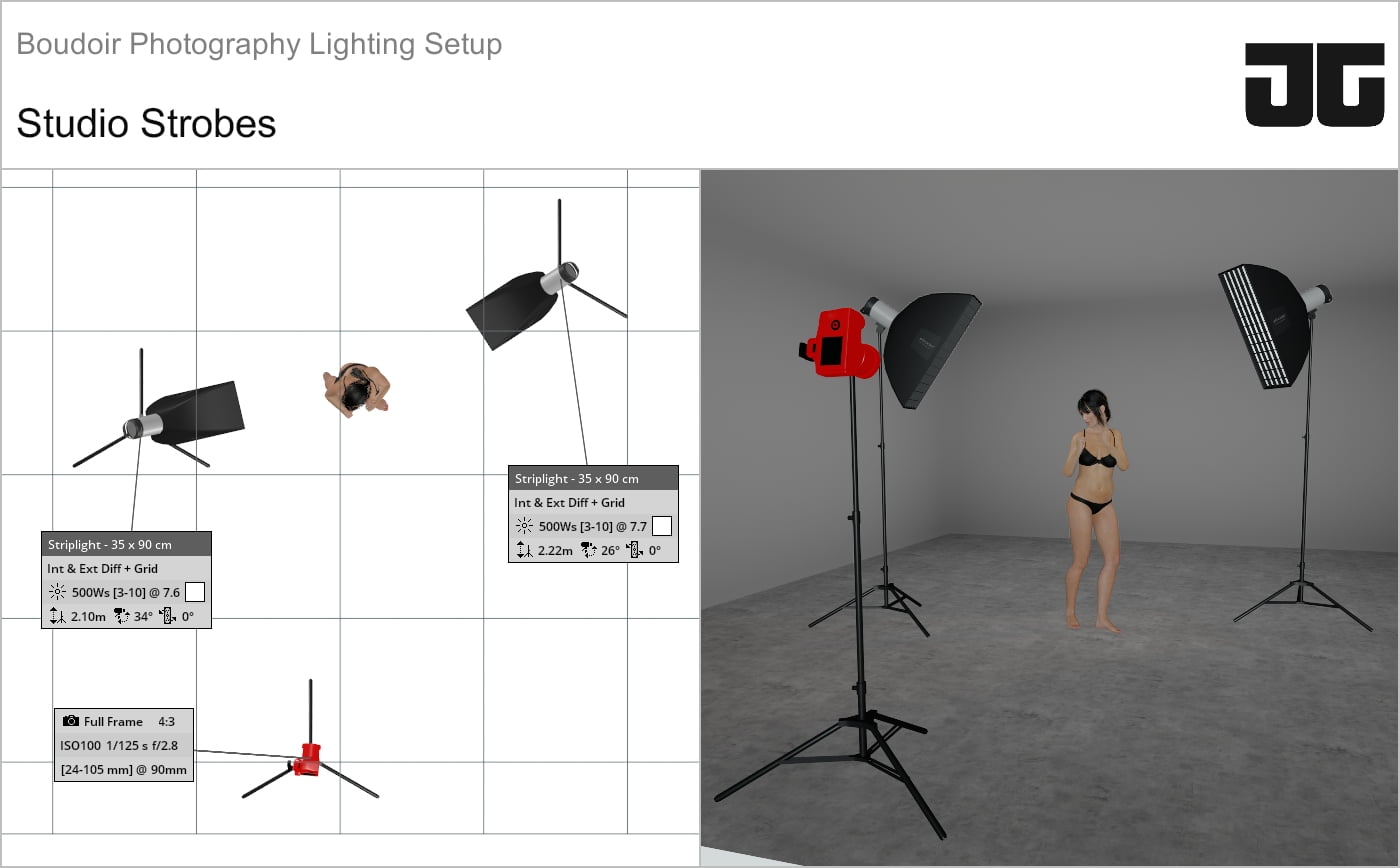
Boudoir Photography Lighting Setup Using Studio Strobes
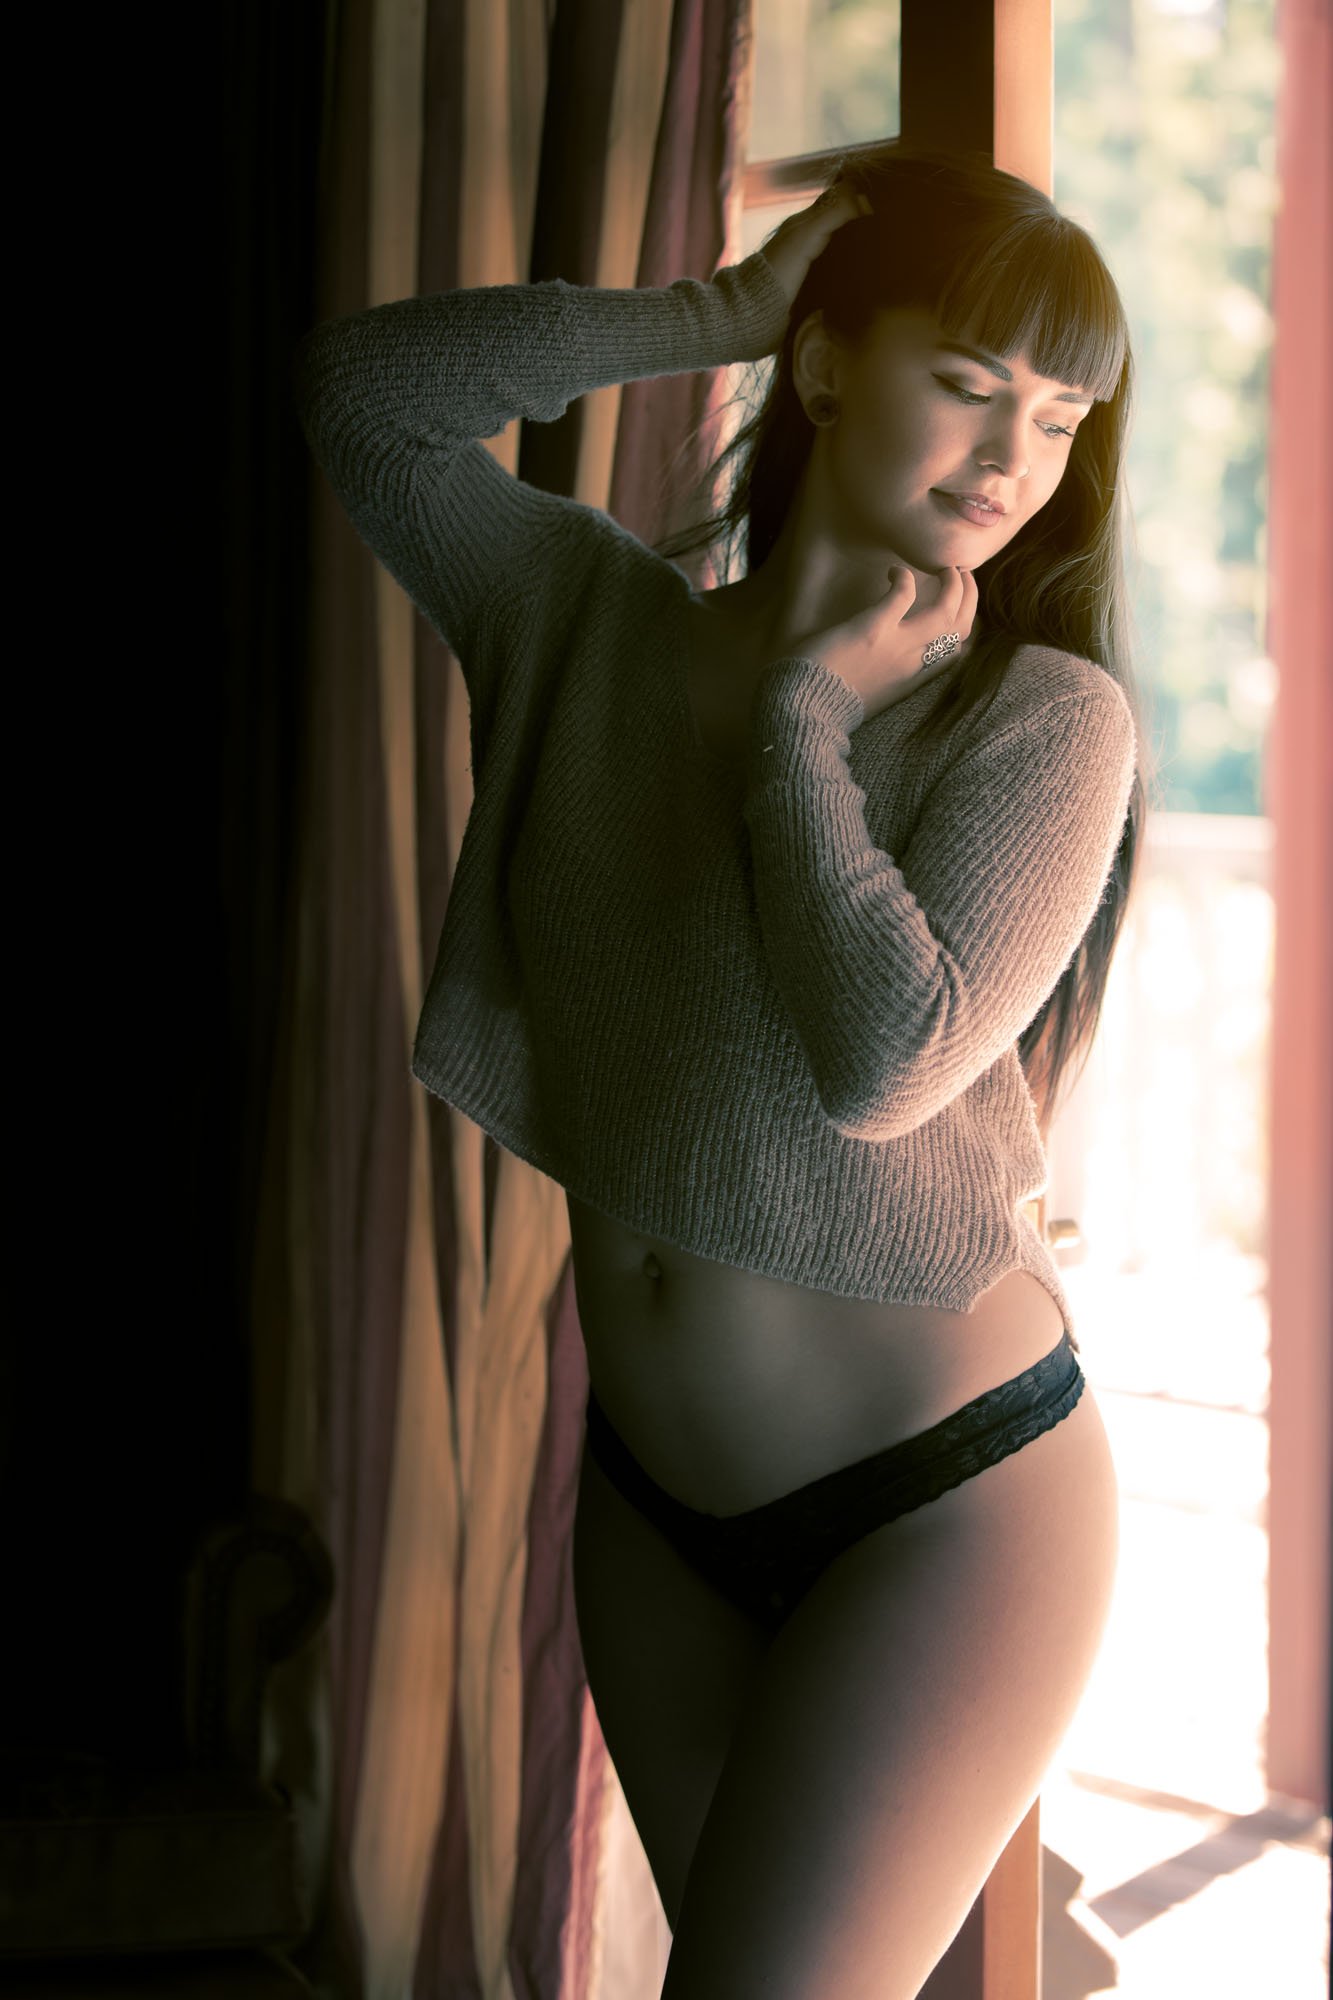
When natural light isn’t enough or unavailable, studio strobes come to the rescue. They can either complement natural light or act as standalone sources. Often, I blend strobes with ambient light for a balanced, rich output. Using the strobe as a key light while allowing ambient light to act as fill light prevents shadows from becoming overly dark.
In the sections below, I’ve detailed a typical two-monolight setup that I rely on frequently. This method uses cross-lighting, akin to the natural light technique, but introduces a secondary rim light. This ensures that the shadows have depth without getting lost in darkness.

Need More Help Building Your Boudoir Kit?
I trust this revamped guide will steer you towards developing a formidable boudoir photography lighting arsenal for your projects. For further enhancement of your toolkit, delve into recommendations on the best lenses and cameras for boudoir photography. With top-notch equipment in hand, you can concentrate on refining your skills, ensuring your clients get the exceptional photos they deserve!