
Taking your own professional headshot is easier than you might think, even without expensive equipment. In this guide, you’ll learn how to take your own headshot using simple and affordable tools. Follow these steps to achieve a polished photo that represents you well online, without the need to hire a professional photographer.
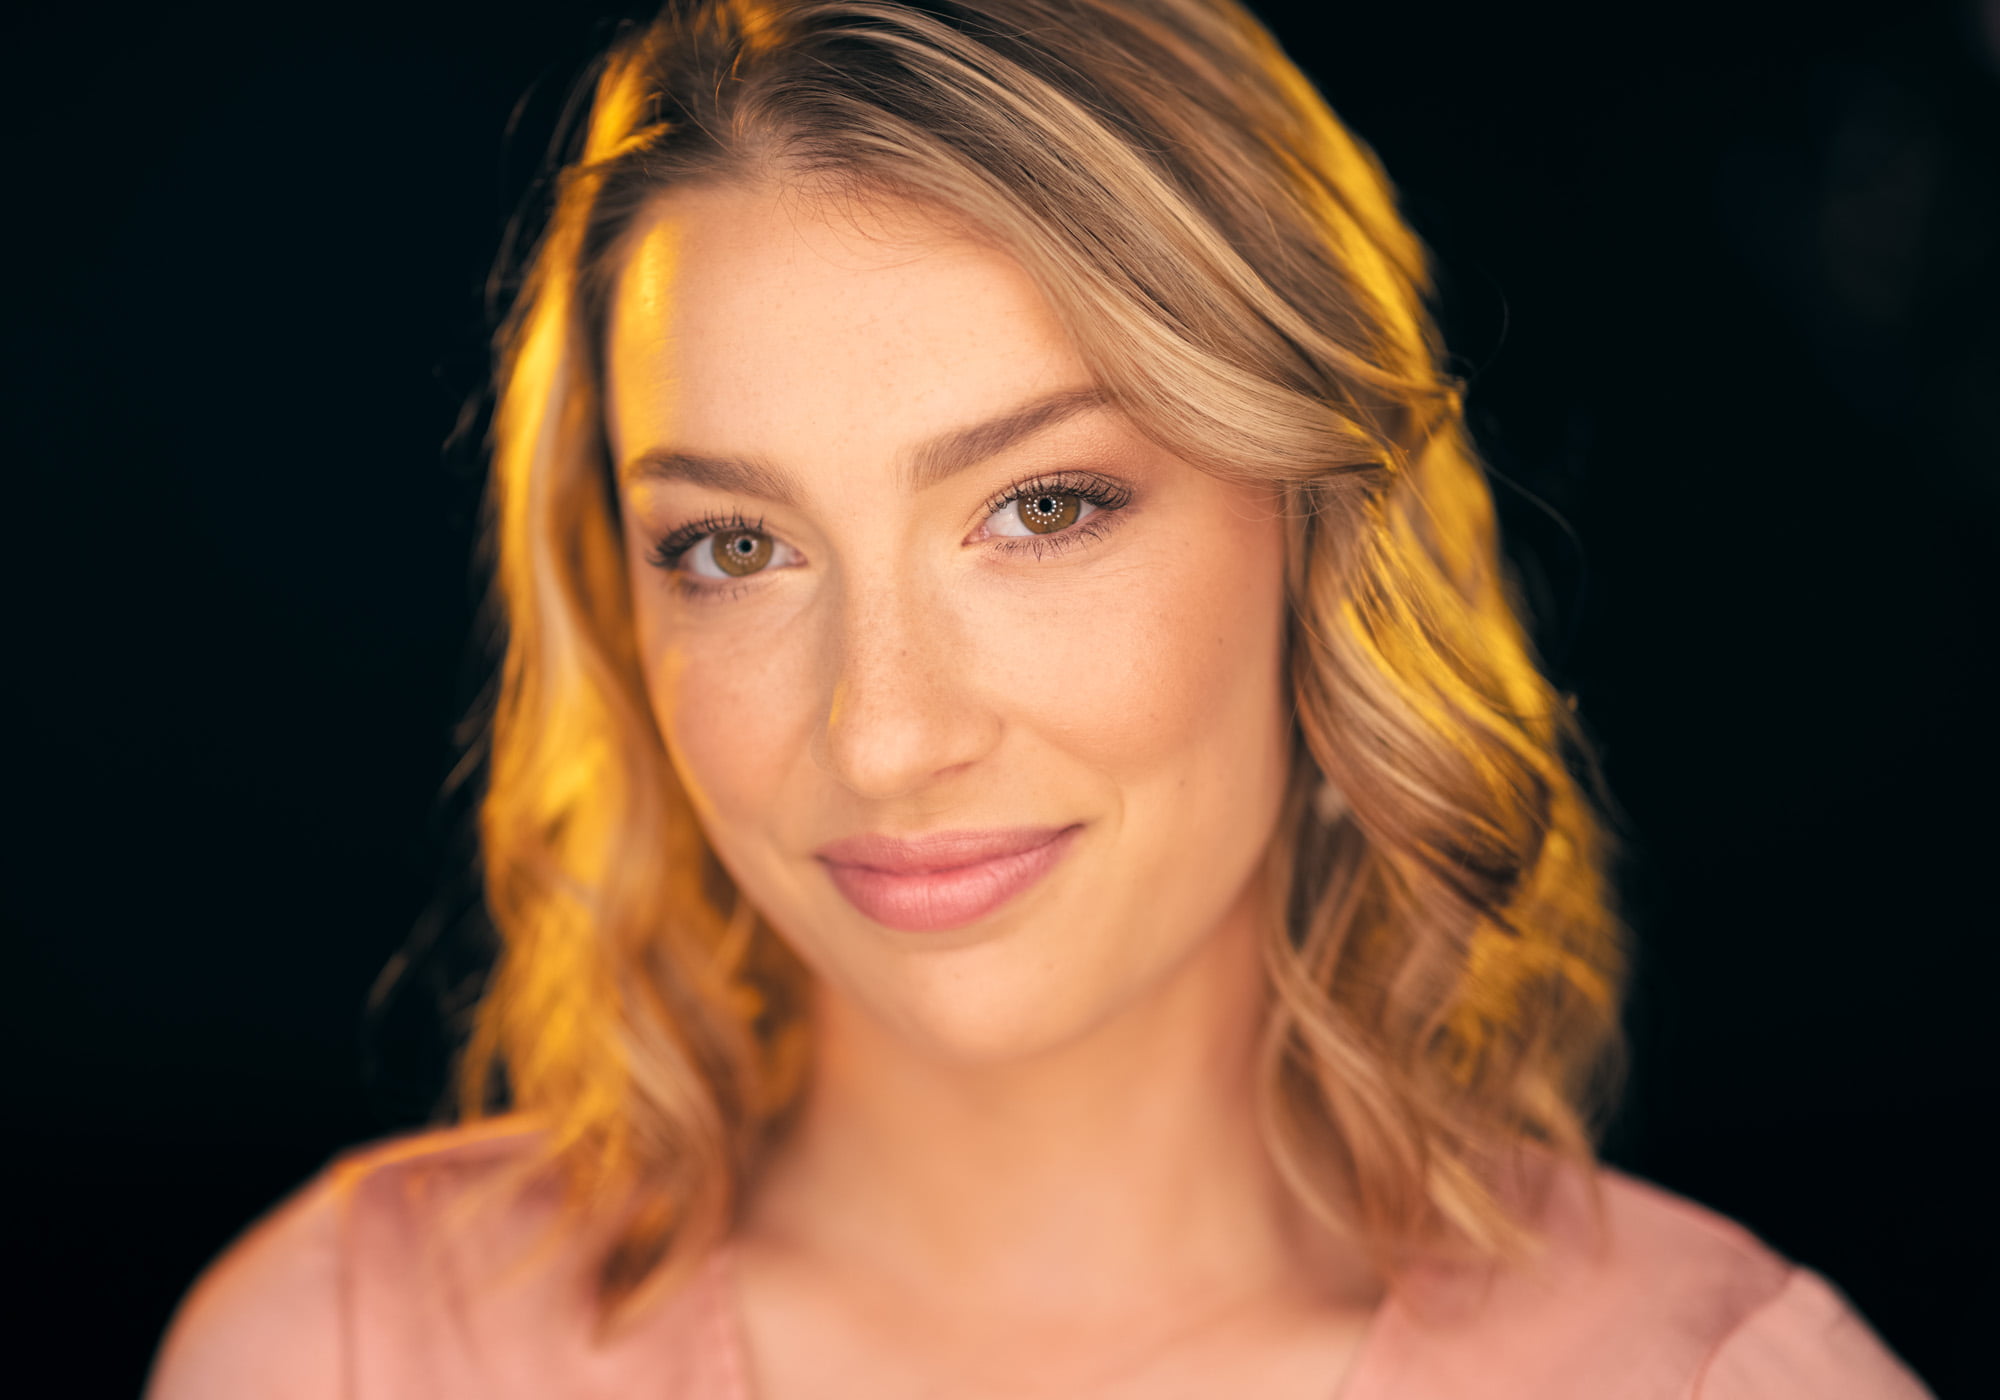
The cover photo for this post is a headshot selfie I took myself. As a professional headshot photographer, I use fancy equipment, but you can get great results with just your phone and a few basic items. I’ll show you an inexpensive lighting setup and share tips to help you look your best in your photos.
How to take your own headshot:
- Recommended Gear To Take Your Own Headshot
- Things That Will Enhance Your Appearance
- What To Wear For Your Headshot
- Lighting Set Up For Your Headshot
- Tips For Taking Professional Headshots With Your Phone
- Editing Your Headshot
This post may contain affiliate links, meaning I get a commission if you decide to make a purchase through my links at no cost to you. Please read my disclosure for more info.
1. Recommended Gear To Take Your Own Headshot
There are countless ways to light and capture a headshot. For the purposes of this post, I’m going to show you an inexpensive and novice friendly set up similar to the one I used for my portrait. This set up will be accessible to anyone and will allow you to capture a quality headshot with minimal gear.
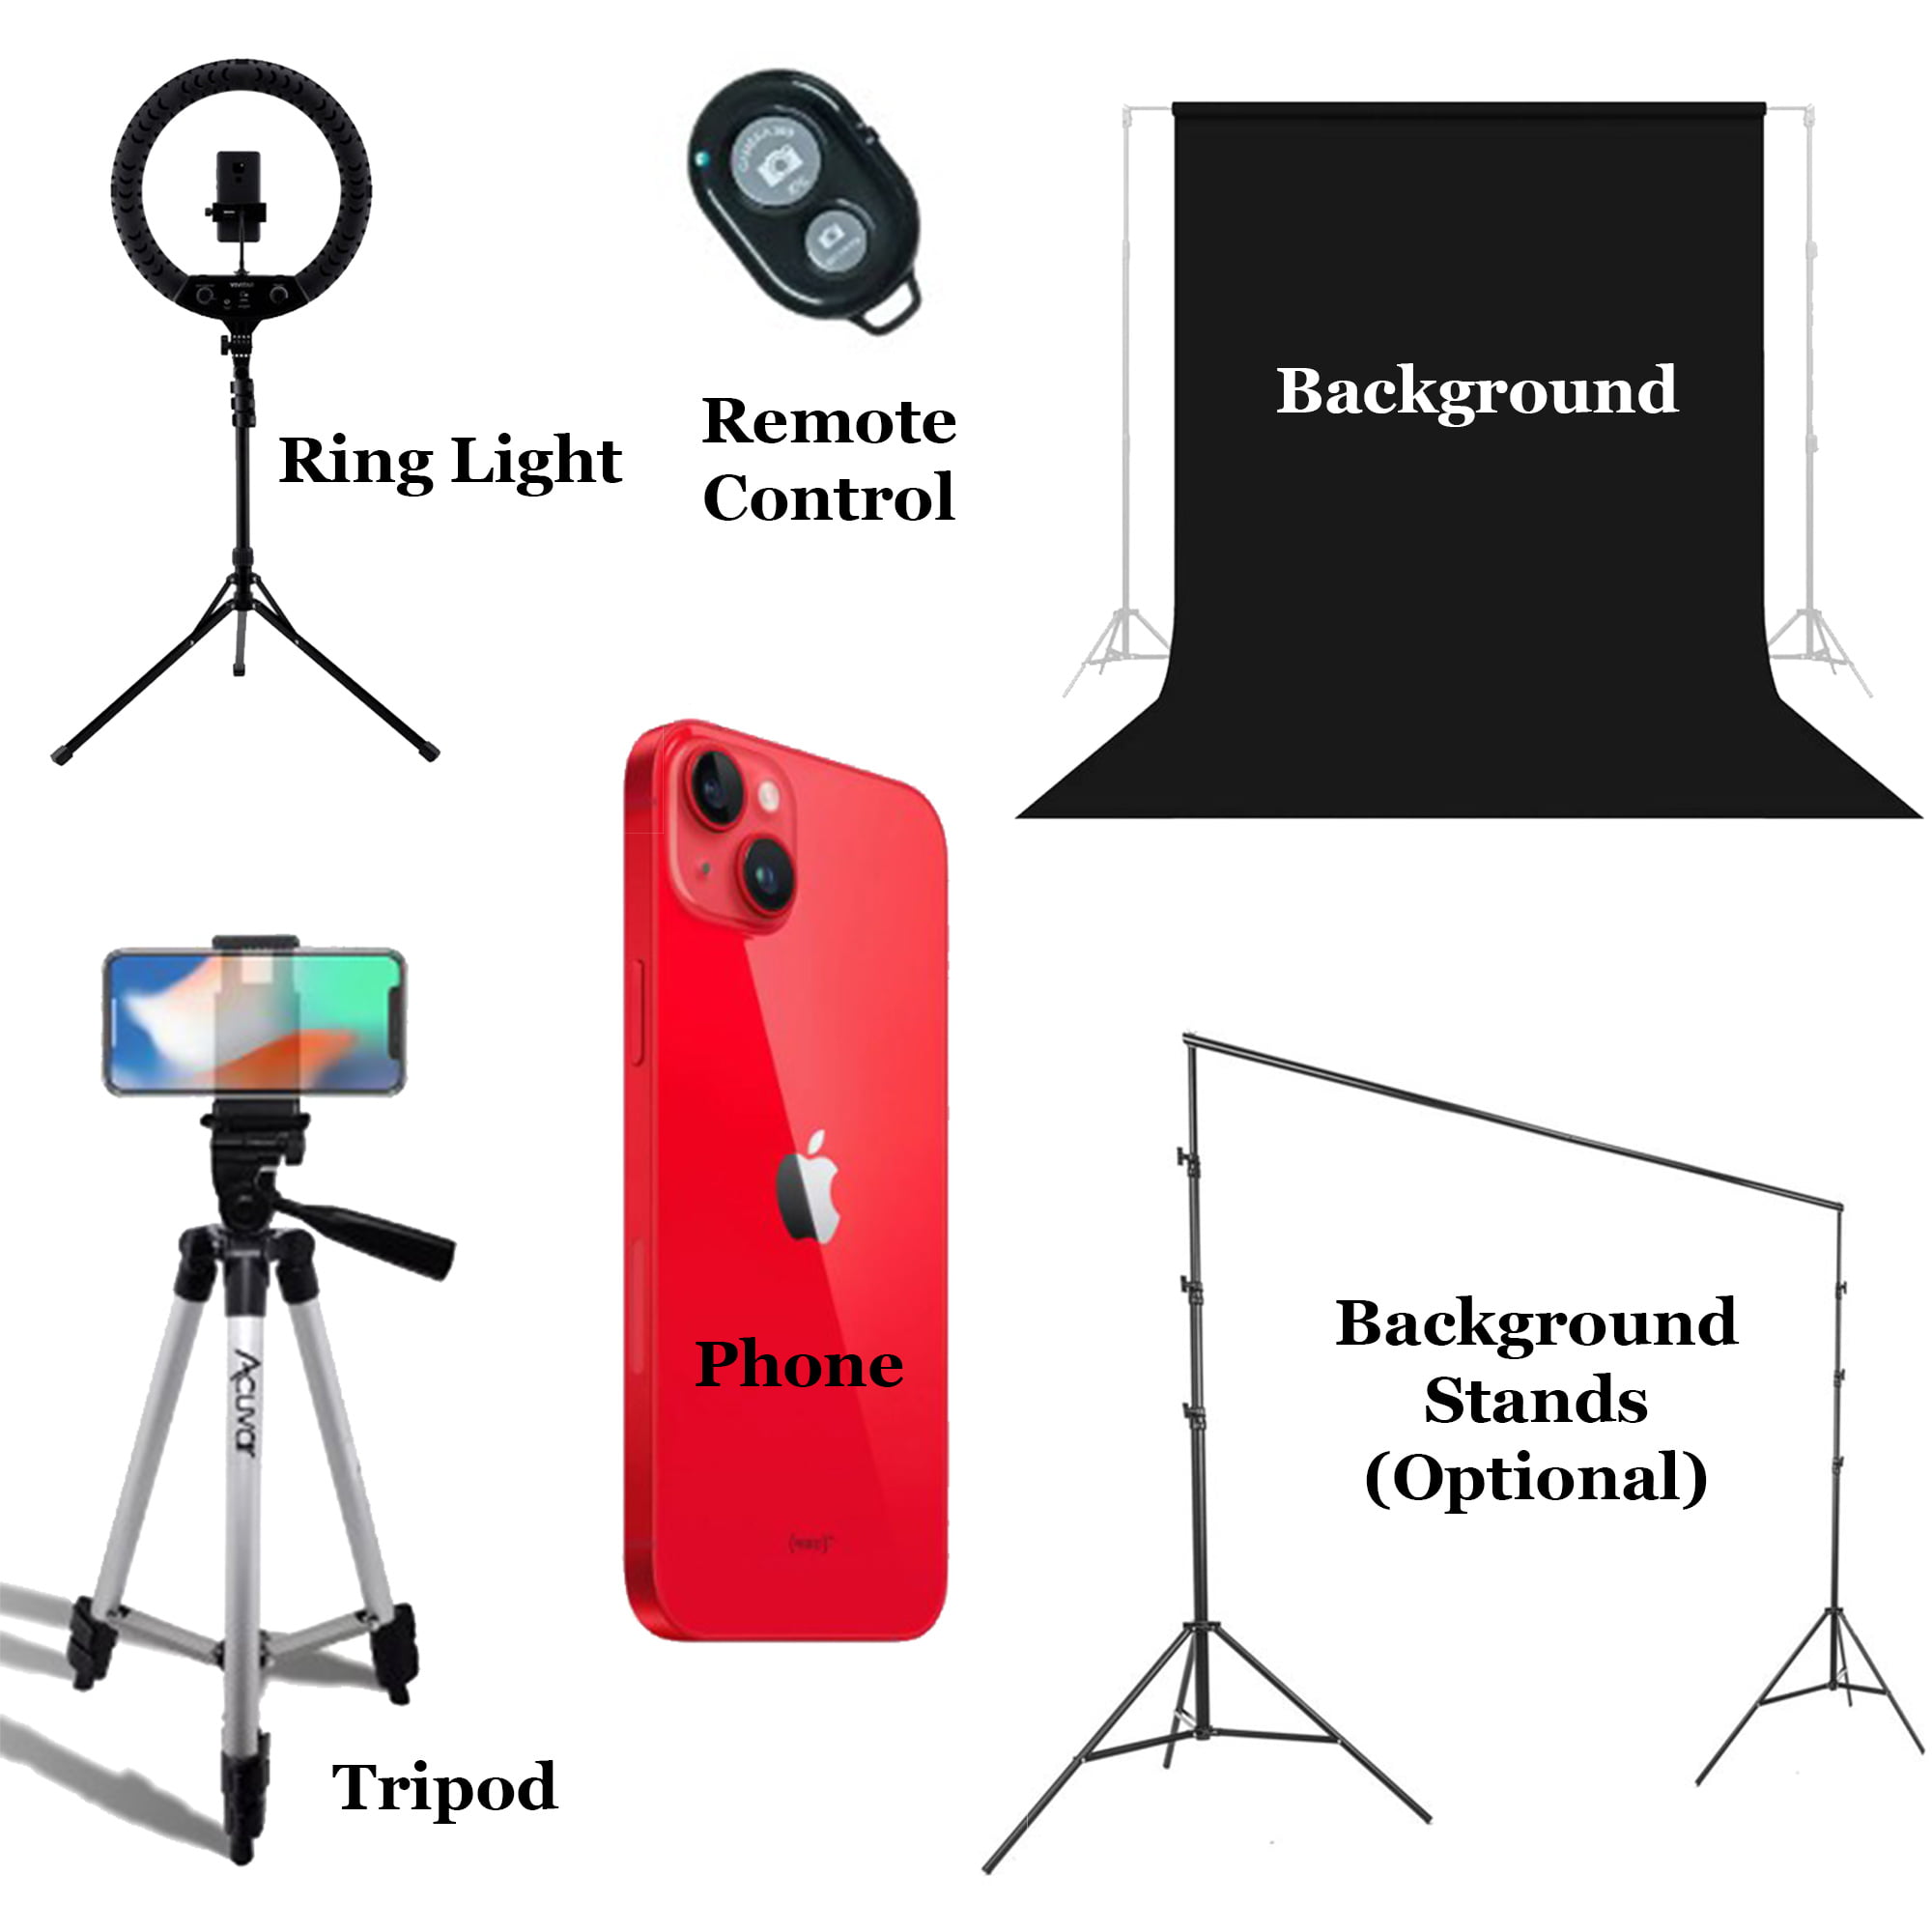
To capture your own headshot you’ll need:
2. Groom Yourself Before You Take Your Own Headshot

Now that you know the tools you’ll need to capture your headshots, it’s also important to properly groom yourself before you take your photos so you can look your best.
This is the headshot checklist that I give to my clients so they are aware of all the different things they can do (or appointments they can book) to improve their appearance in anticipation for their headshot. These things include:
- Removing your eyeglass lenses (if you wear glasses)
- Getting a hair cut and color
- Makeup
- Teeth whitening
Always remember that you’ll get the best photos if you try and capture everything as close as you can in camera (no editing). With a clean capture you can then edit your photos to your liking. For best results editing should never be done to fix something that could have been corrected in camera. This is why it’s important to think about the things mentioned above before you take your photos.
3. Headshot Attire You Should Consider Before You Take Your Own Headshot
The last thing you’ll want to think about before you start taking your photos is what you’ll wear. Luckily for headshots this is a lot simpler then full body portraits as you’ll only need to consider the top half of your body and your background choice when deciding what to wear. This post will give you ideas for what to wear for women’s headshots. For guys, this post will give some ideas for men’s headshot attire.
In either case, I strongly recommend everyone check out this post about how to color coordinate outfits if you’re unsure how to do this. Learning how to color coordinate you outfits properly will help you better pair your outfits with the background you choose. It will also help you tie your outfit together when pairing a shirt with a blazer, or your blouse with jewelry.
4. Lighting Setup For Taking Your Own Headshot
Now that you have everything you’ll need to take your own headshot it’s time to start capturing some photos! Your attention to detail at this part will ultimately determine the quality of your headshots.
First you’re going to want to set up your background. You can cut off a strip of background paper and tape it to your wall. Alternatively you can get a background kit like this if you want. For maximum control, I recommend you get the biggest seamless background you can. This will allow you to stand further away from it which can help keep the ring light from spilling onto the background in the final photos. Alternatively if you’re on a budget, you can simply use a blank wall in your home as your backdrop.
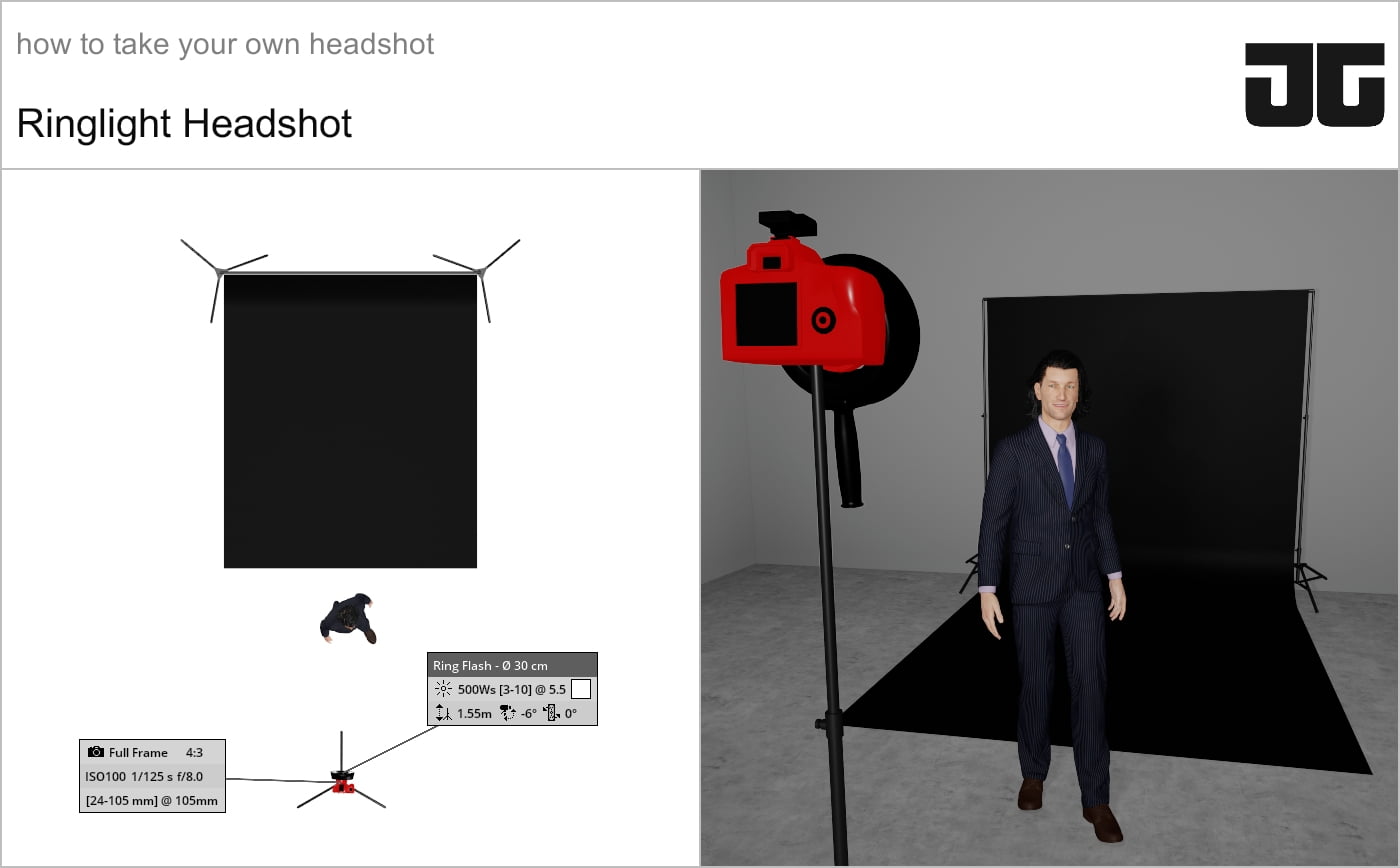
Second you’ll want to set up your ring light, tripod, phone and remote like the diagram. For best results you’re going to want to stand as close as possible to your ring light. This will build the most flattering light that will contour your features. If you stand further away the light will get flatter and will be less professional looking.
Once you’re all set up, you’ll wan to use your remote to take your headshots. Using a remote will make capturing your photos much easier as you won’t have to rely on your camera’s timer and run back and forth to your phone for every shot. This will help you focus on nailing the perfect expression rather than setting up for every photo.
Lastly for iphone users, consider downloading a manual camera app like Halide. The reason for this is because even though you have semi manual control with the native camera app, I’ve found that the camera like to help you expose the shot when the scene changes. This means that even if you set the exposure manually, once you walk into the frame, the camera will change your settings in an effort to “help” you.
Android users and those that use a third party manual camera app like Halide will be able to lock in their exposure and have it stay where you set it even when you walk into the frame. This is really important as without this capability, capturing your own headshot will be much more difficult without someone to help you capture your photos.
5. Tips For Taking Professional Headshots With Your Phone
Taking a professional headshot with your phone is entirely possible if you follow these key tips. Each step will help you achieve the best possible results with minimal effort and equipment.
- Clean Your Camera Lens – Before you begin, make sure the lens of your camera is clean. The lens on your phone can get dirty from daily activities like being in your pocket. Use a soft cloth and mild cleaners to clean the lens and avoid any damage to your phone’s camera. A clean lens ensures your photos are crisp and clear.
- Use the Rear Camera – Whenever possible, use the back camera on your phone instead of the selfie camera. While the selfie camera is convenient, the rear camera offers higher quality and better captures. For the best results, always opt for the back camera.
- Choose the Right Orientation – You can take your headshot in either portrait or landscape orientation, depending on your preference. Regardless of the orientation, crop the photo so your face is the focal point. Avoid full-body shots for headshots, as they detract from the main focus.
- Leave Space for Cropping – For beginners, leave a little space around your head when taking your photos. This prevents accidentally cutting off any part of your head or body. You can crop the image later to perfect your headshot without compromising quality.
- Position Your Phone Correctly – Place your phone at eye level for a professional result. Avoid placing the phone too high or too low, as this can look unprofessional. Slightly tip the top of your camera forward—about 10 degrees—for a flattering distortion. Always tilt the top, never the bottom, to avoid unflattering angles.


6. Editing Your Headshots

Once you capture an expression you like, your photo should look great without any editing. If you need to do some minor blemish touchup, you can then process your headshot with one of the following apps:
Note that you’ll also be able to add filters with all of these photo editing apps. Instead of filters I recommend that you use standard photo editing adjustments like: white balance, exposure, black point, highlights, etc. This will help your photos hold up better over time as filters have a way of dating your photo. If you do decide to use a filter be judicious with it’s application and don’t overdo it!
If you already have the adobe suite on your desktop, consider using Lightroom or Photoshop for your edits. These apps will give you the most control and are what I personally use as a professional photographer on my clients headshots. That said if you don’t have experience with these apps, they can have a steep learning curve. Therefore if you’ve never used them before you may want to consider the mobile editing apps mentioned above to keep things simple.
Like, Share & Comment!
I hope this post was helpful in showing you how to take your own headshot. If you need more diy headshot tips you can check out this post here. Alternatively, if the thought of taking your own headshot still feels over whelming, you can contact me here and I’d be happy to discuss capturing your headshot for you.
If you have any questions about anything, please leave a comment below and I’d be happy to help you out. Otherwise, so long as you follow the directions outlined in this post, I have no doubt that you’ll be able to create a quality headshot that you can use to better represent yourself online!